Superstudio: Finding the Horizon
Until not too long ago, I would be asked to explain to youngsters accustomed to digital graphics how I used to make montages. I felt like an archaeologist, explaining how, in the Palaeolithic era, Neanderthals used to make their tools.
Across several workshops, I have realised that the techniques today are fundamentally the same: cut, copy, paste – just digitally rather than mechanically. The main problem is the lack of understanding of perspective, without which, in my experience, it is impossible to obtain good results.
It is probably unnecessary to know the rules of descriptive geometry by heart (I really don’t know them too well either), because today the help Adobe offers is substantial; however, the difficulties of inserting a building or an object into an environment give completely different results depending on how well the principles of perspective geometry are understood.
I am usually asked how we came to imagine invented buildings, placing them in settings that made the final result captivating. The first thing we did was choose a good image, without which no amount of effort would have led to an appreciable result. But it also had to allow us to find the essential components of perspective, to make the image we wanted to insert congruent with the environment. There are images that, although beautiful, wouldn’t work, as it is impossible to determine their horizon line, and others that don’t really do the job unless you’re particularly strong in the perspective technique, or want to waste a lot of time. In some pictures the square is not vertical and the horizon line is curved rather than straight, requiring it to be built point by point. It is better to avoid that. Other times the horizon line can’t be found because the image has been modified: the perspective setup is altered and can’t be worked any further as the parallels don’t converge to the same point on the horizon line.
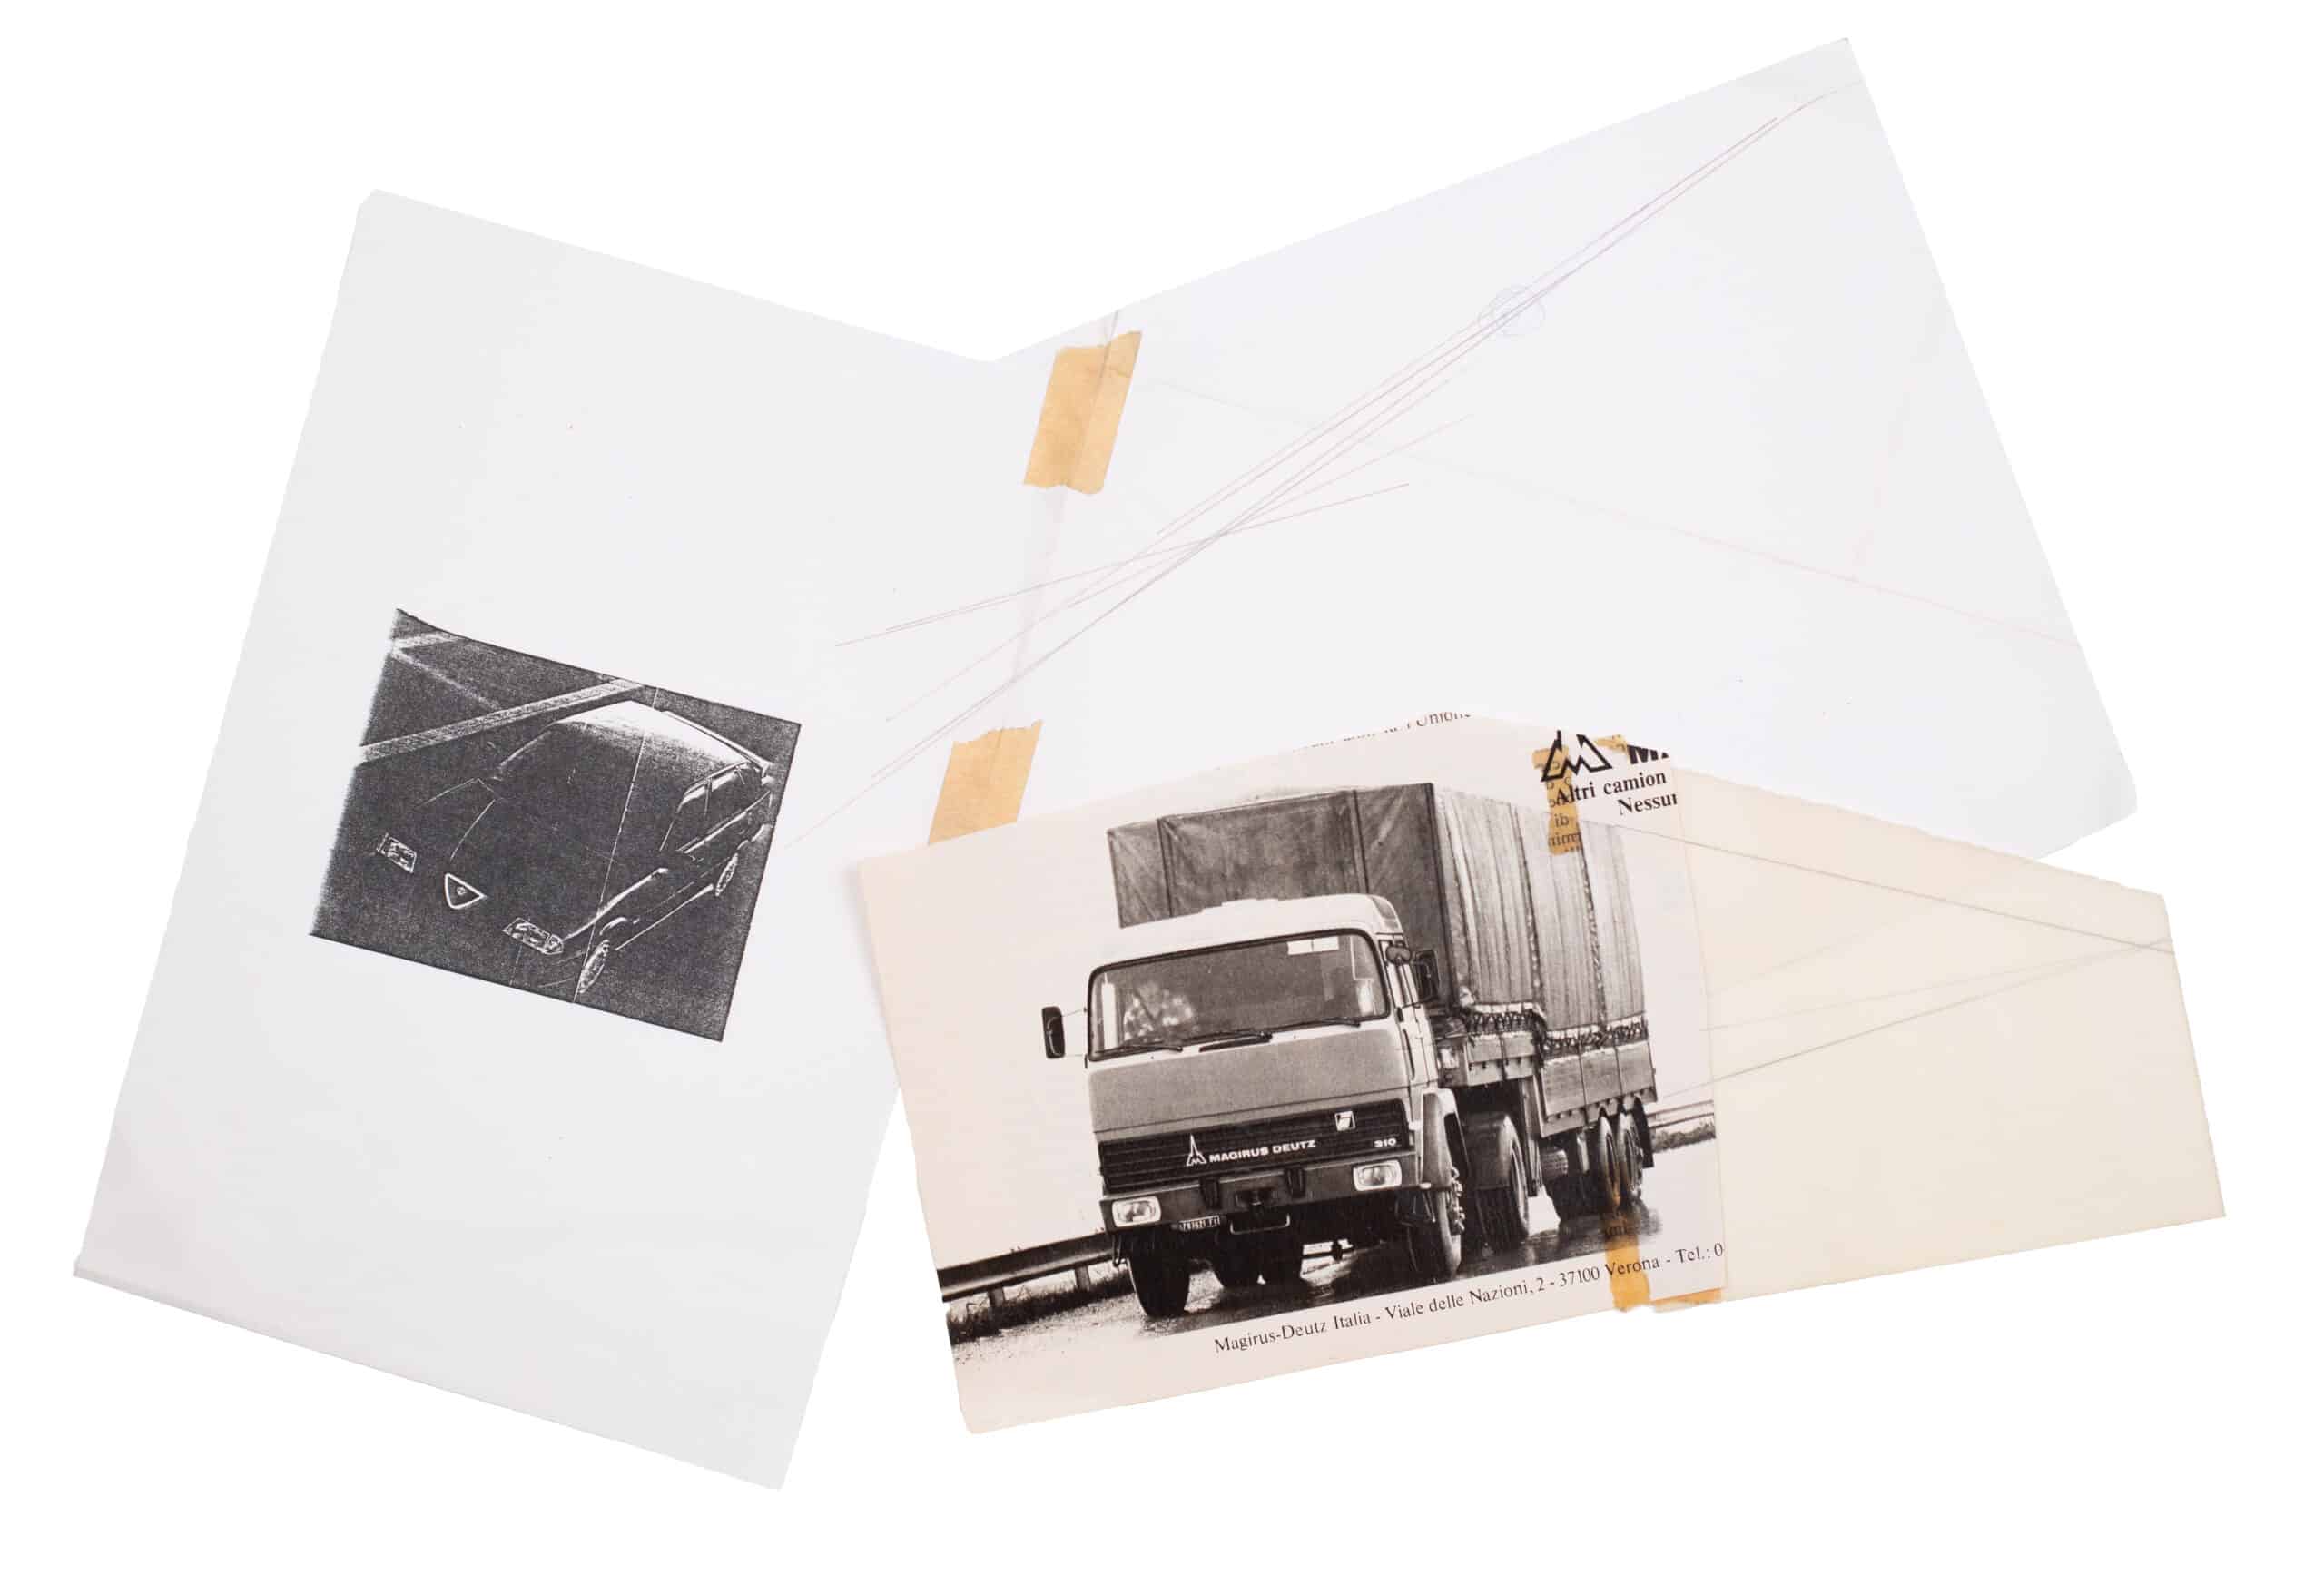
Back then the research for the right image was therefore fundamental. We relied on magazine illustrations, flicking for hours and hours through the image archive we had. Houses were a great help in finding the horizontal parallels that, converging on the horizon line, allowed us to place it in the image.
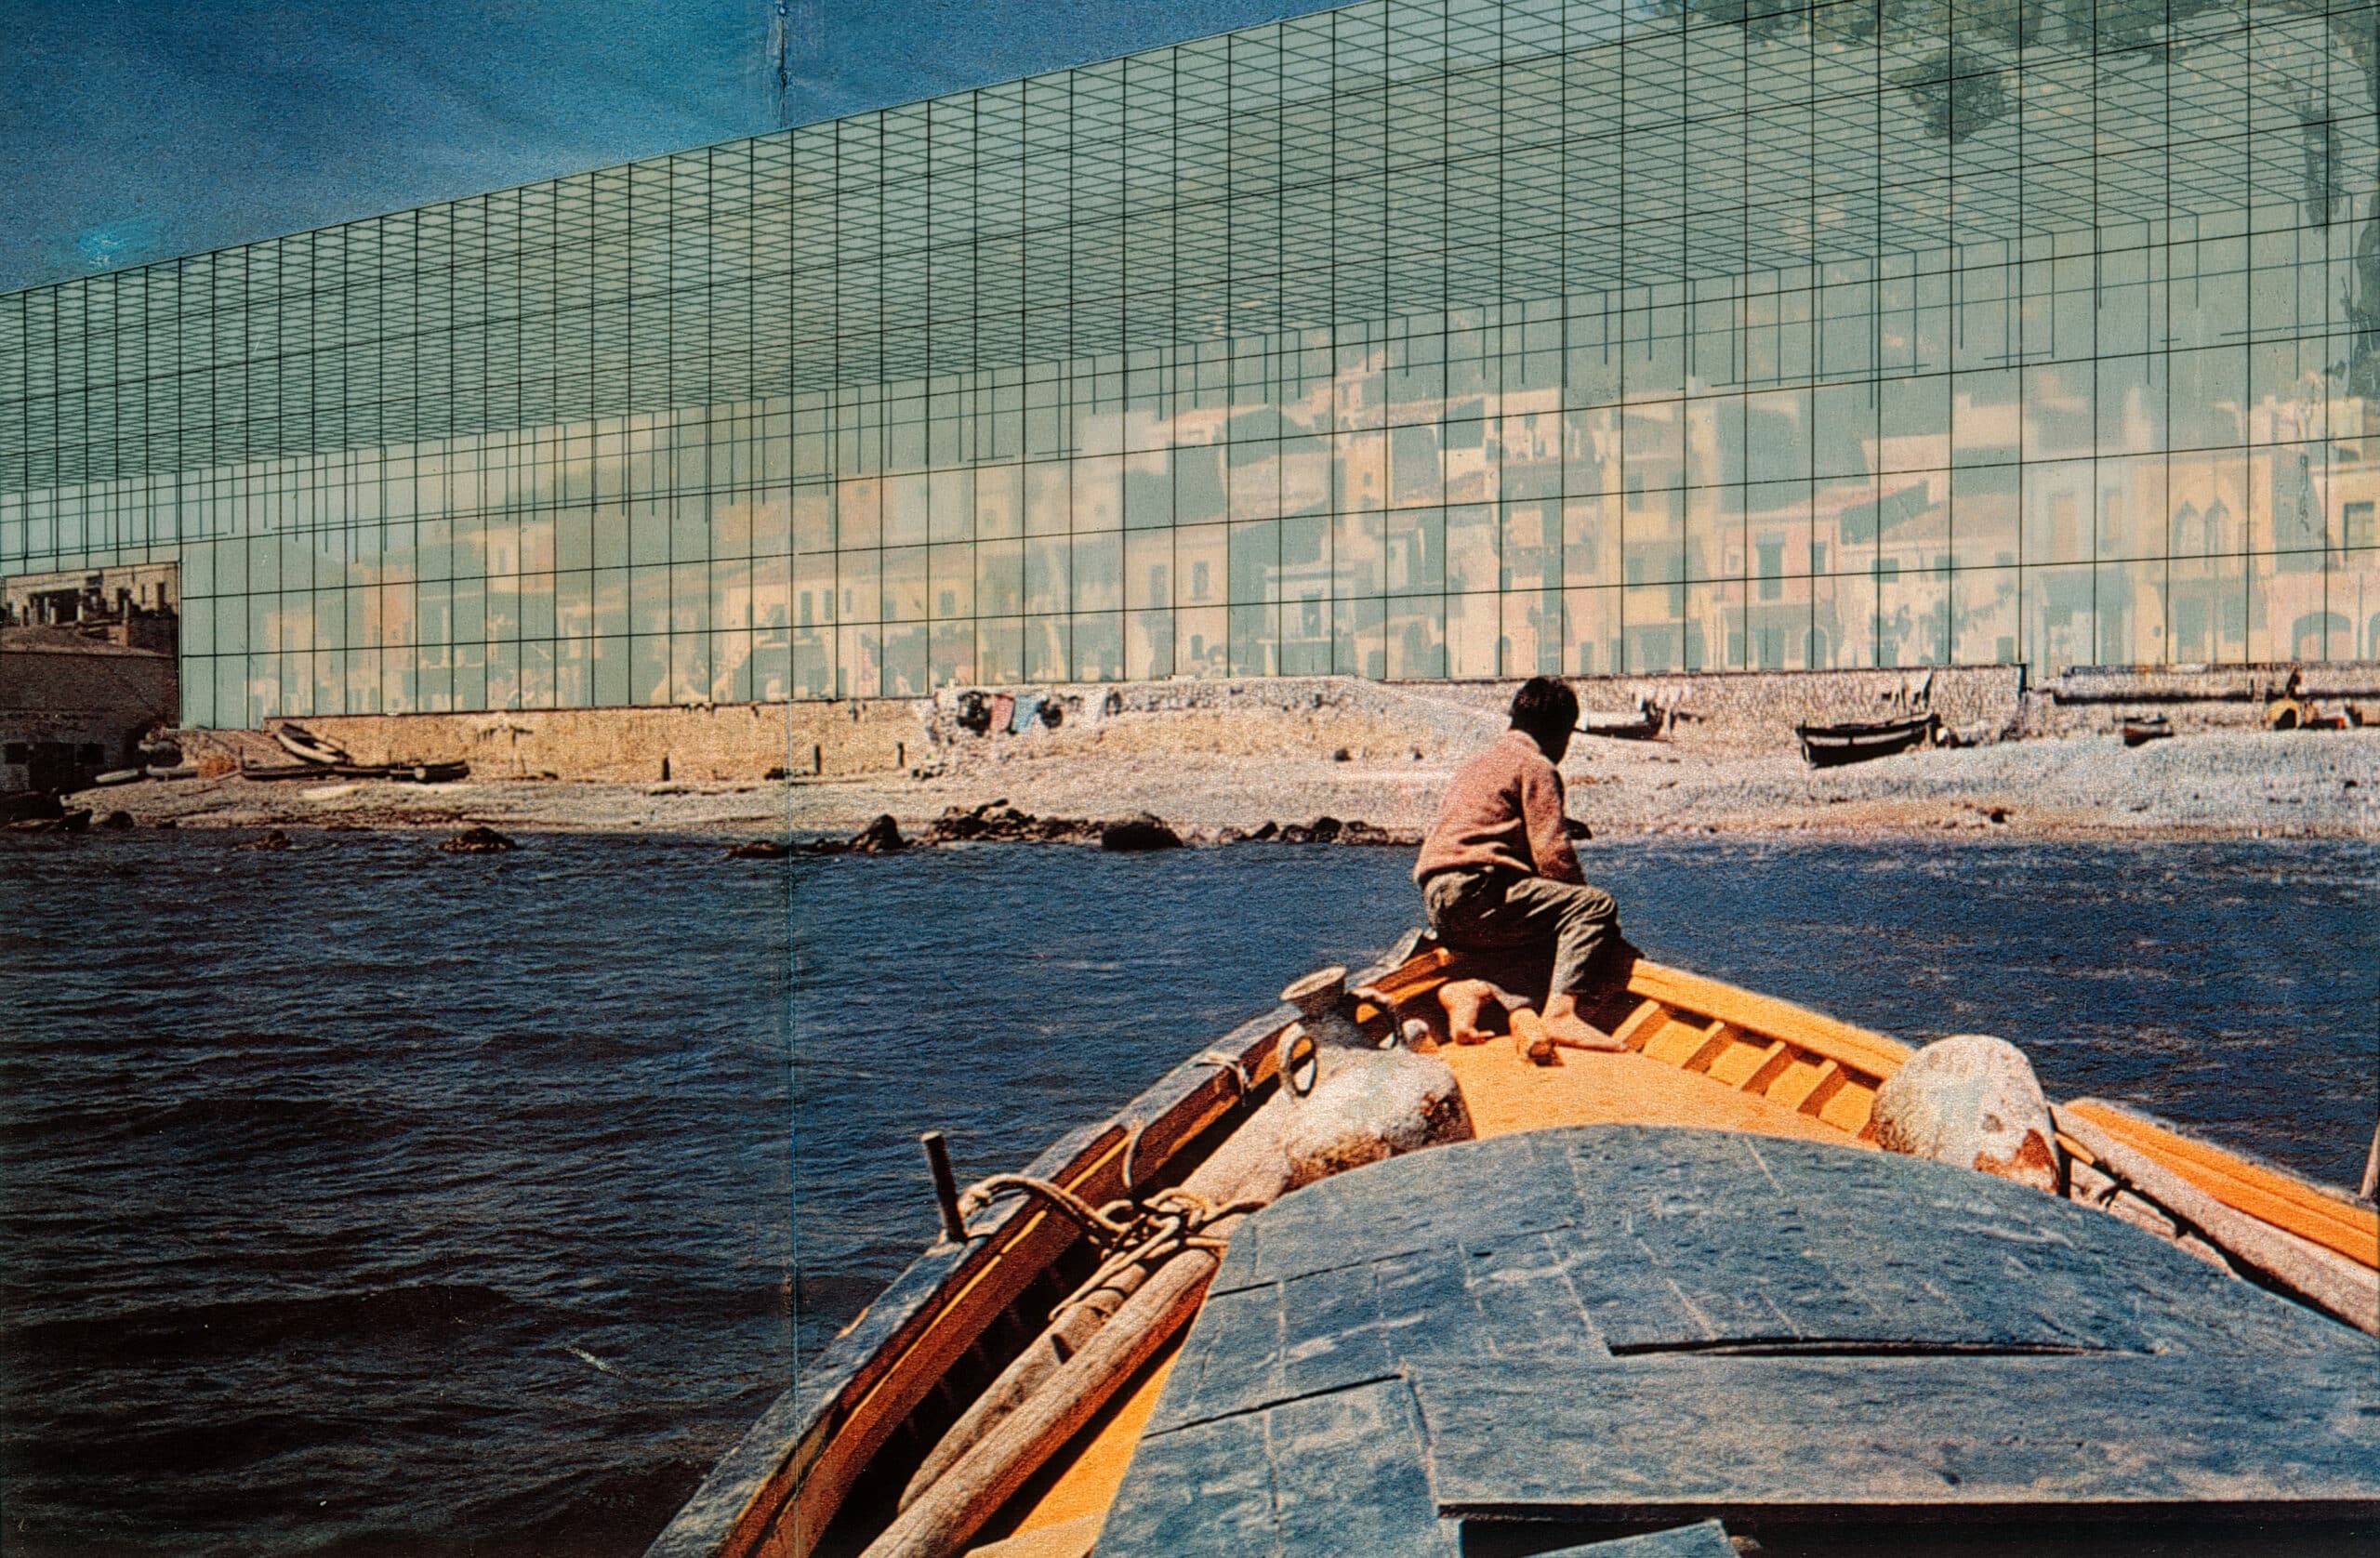
Today with Photoshop it is a lot easier, although, not knowing how to use it, I don’t know to what extent the detection of horizon line or vanishing points is automatic. Back then everything helped. In one image, for example, it seemed impossible to find the horizon line, or the vanishing point. In another it likewise seemed impossible, but just by looking and enlarging a detail, say the boat at the bottom of the picture, we were able to gain the parallels to create the picture’s horizon line.
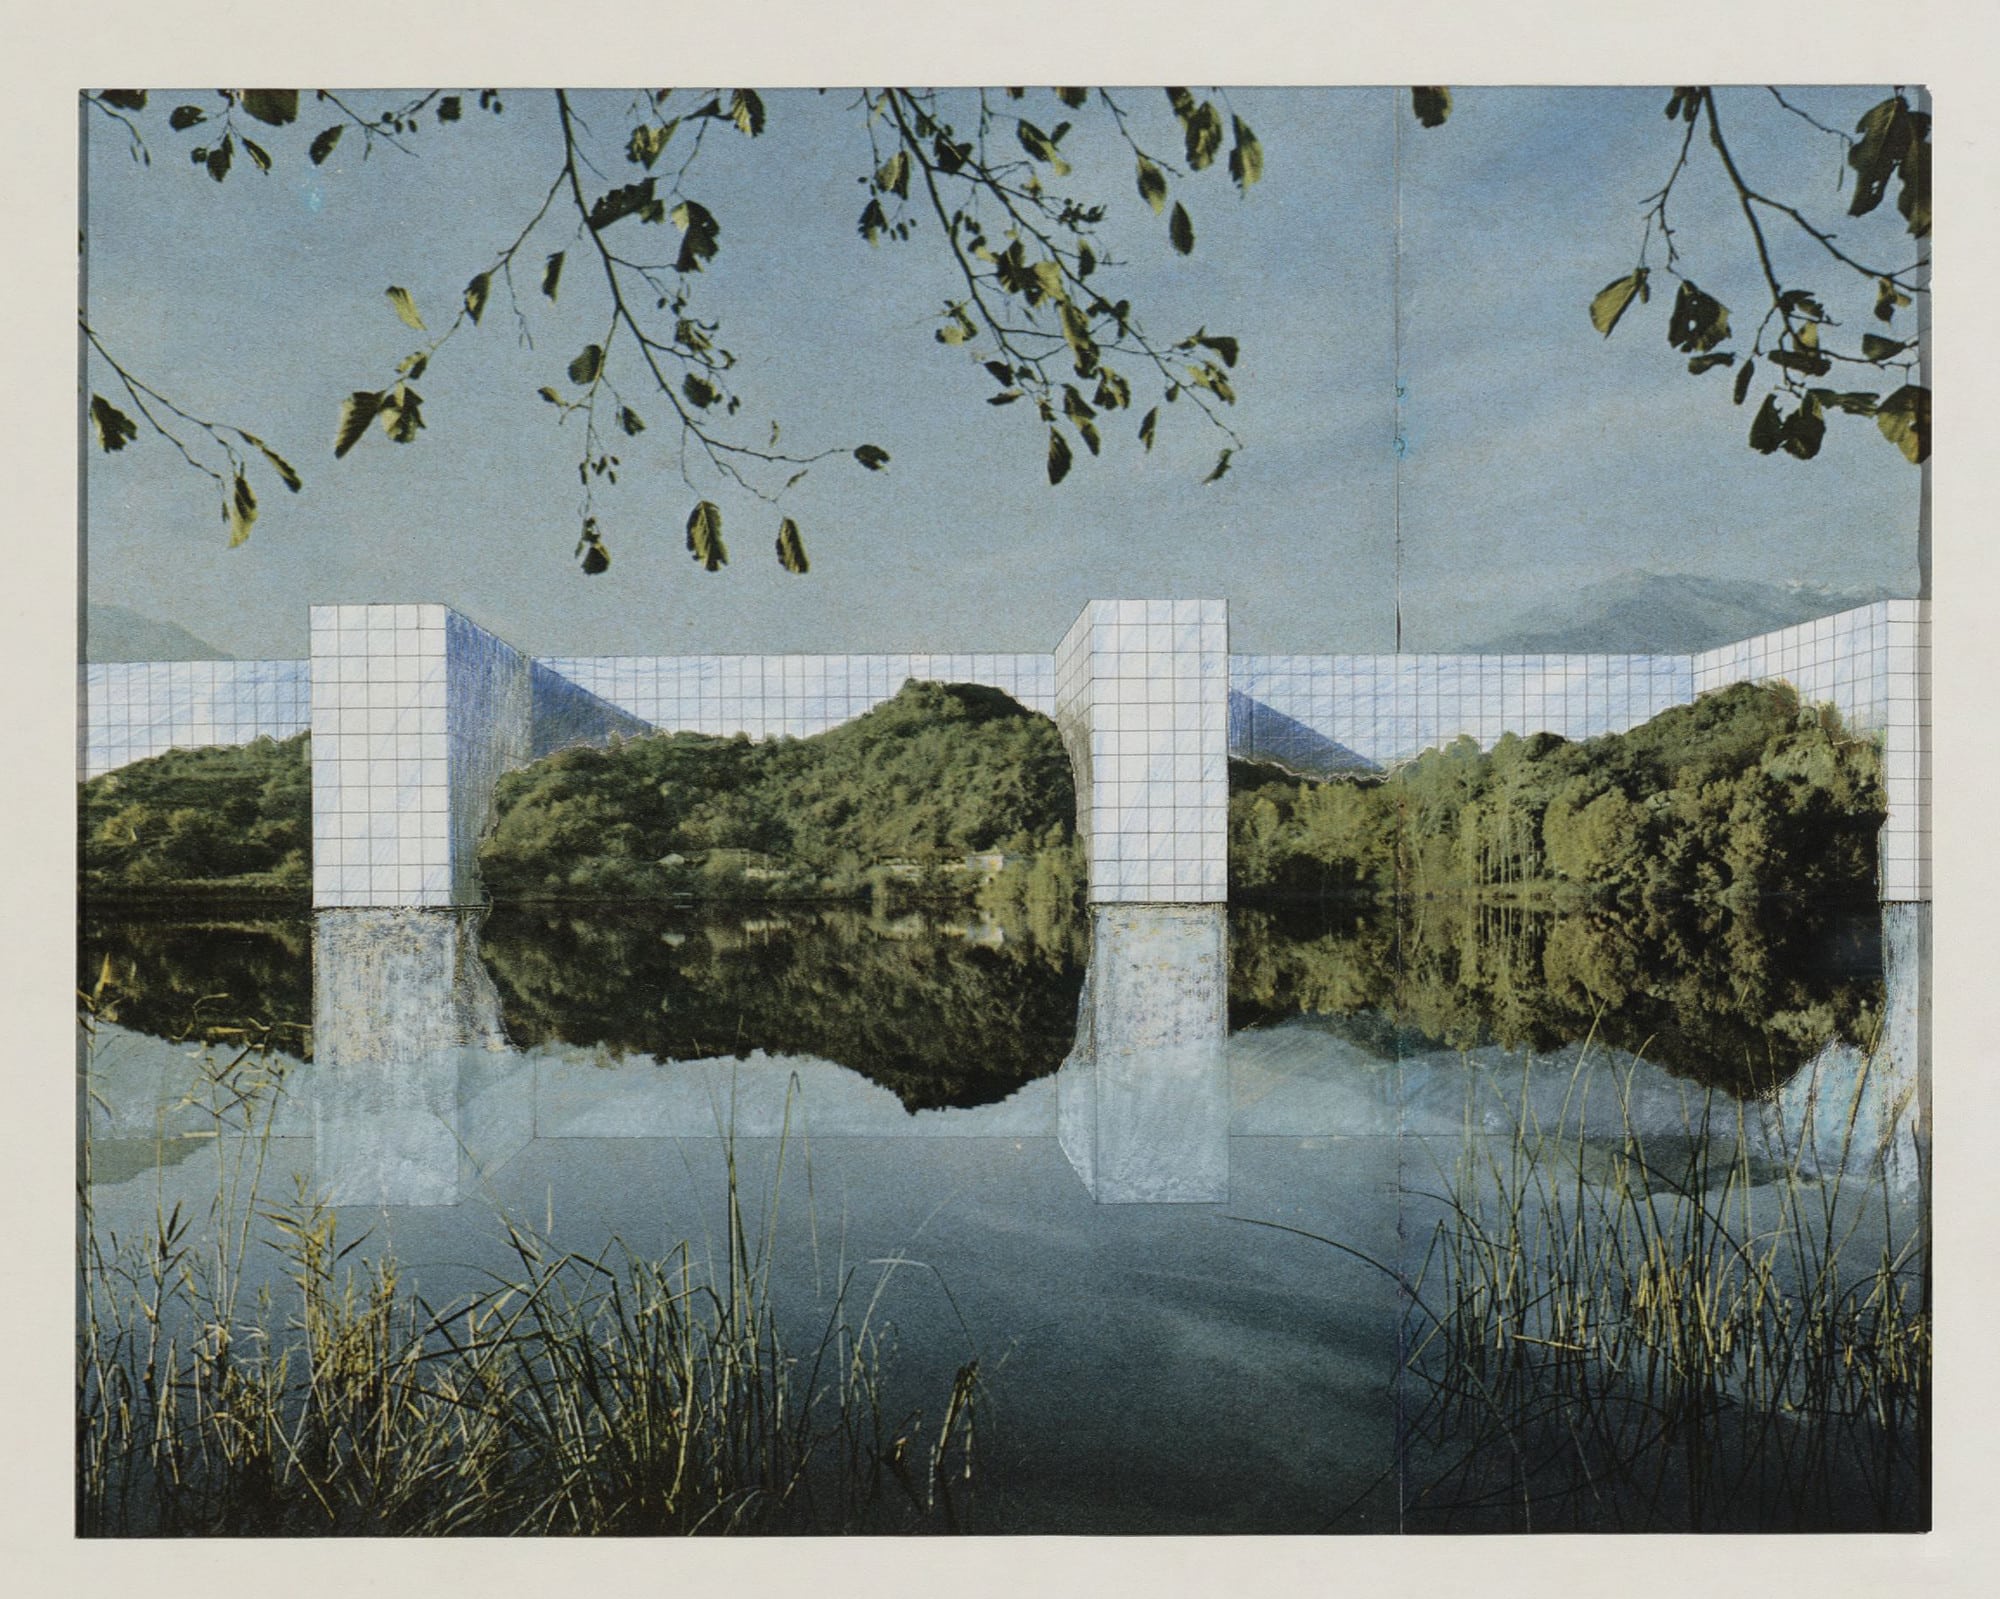
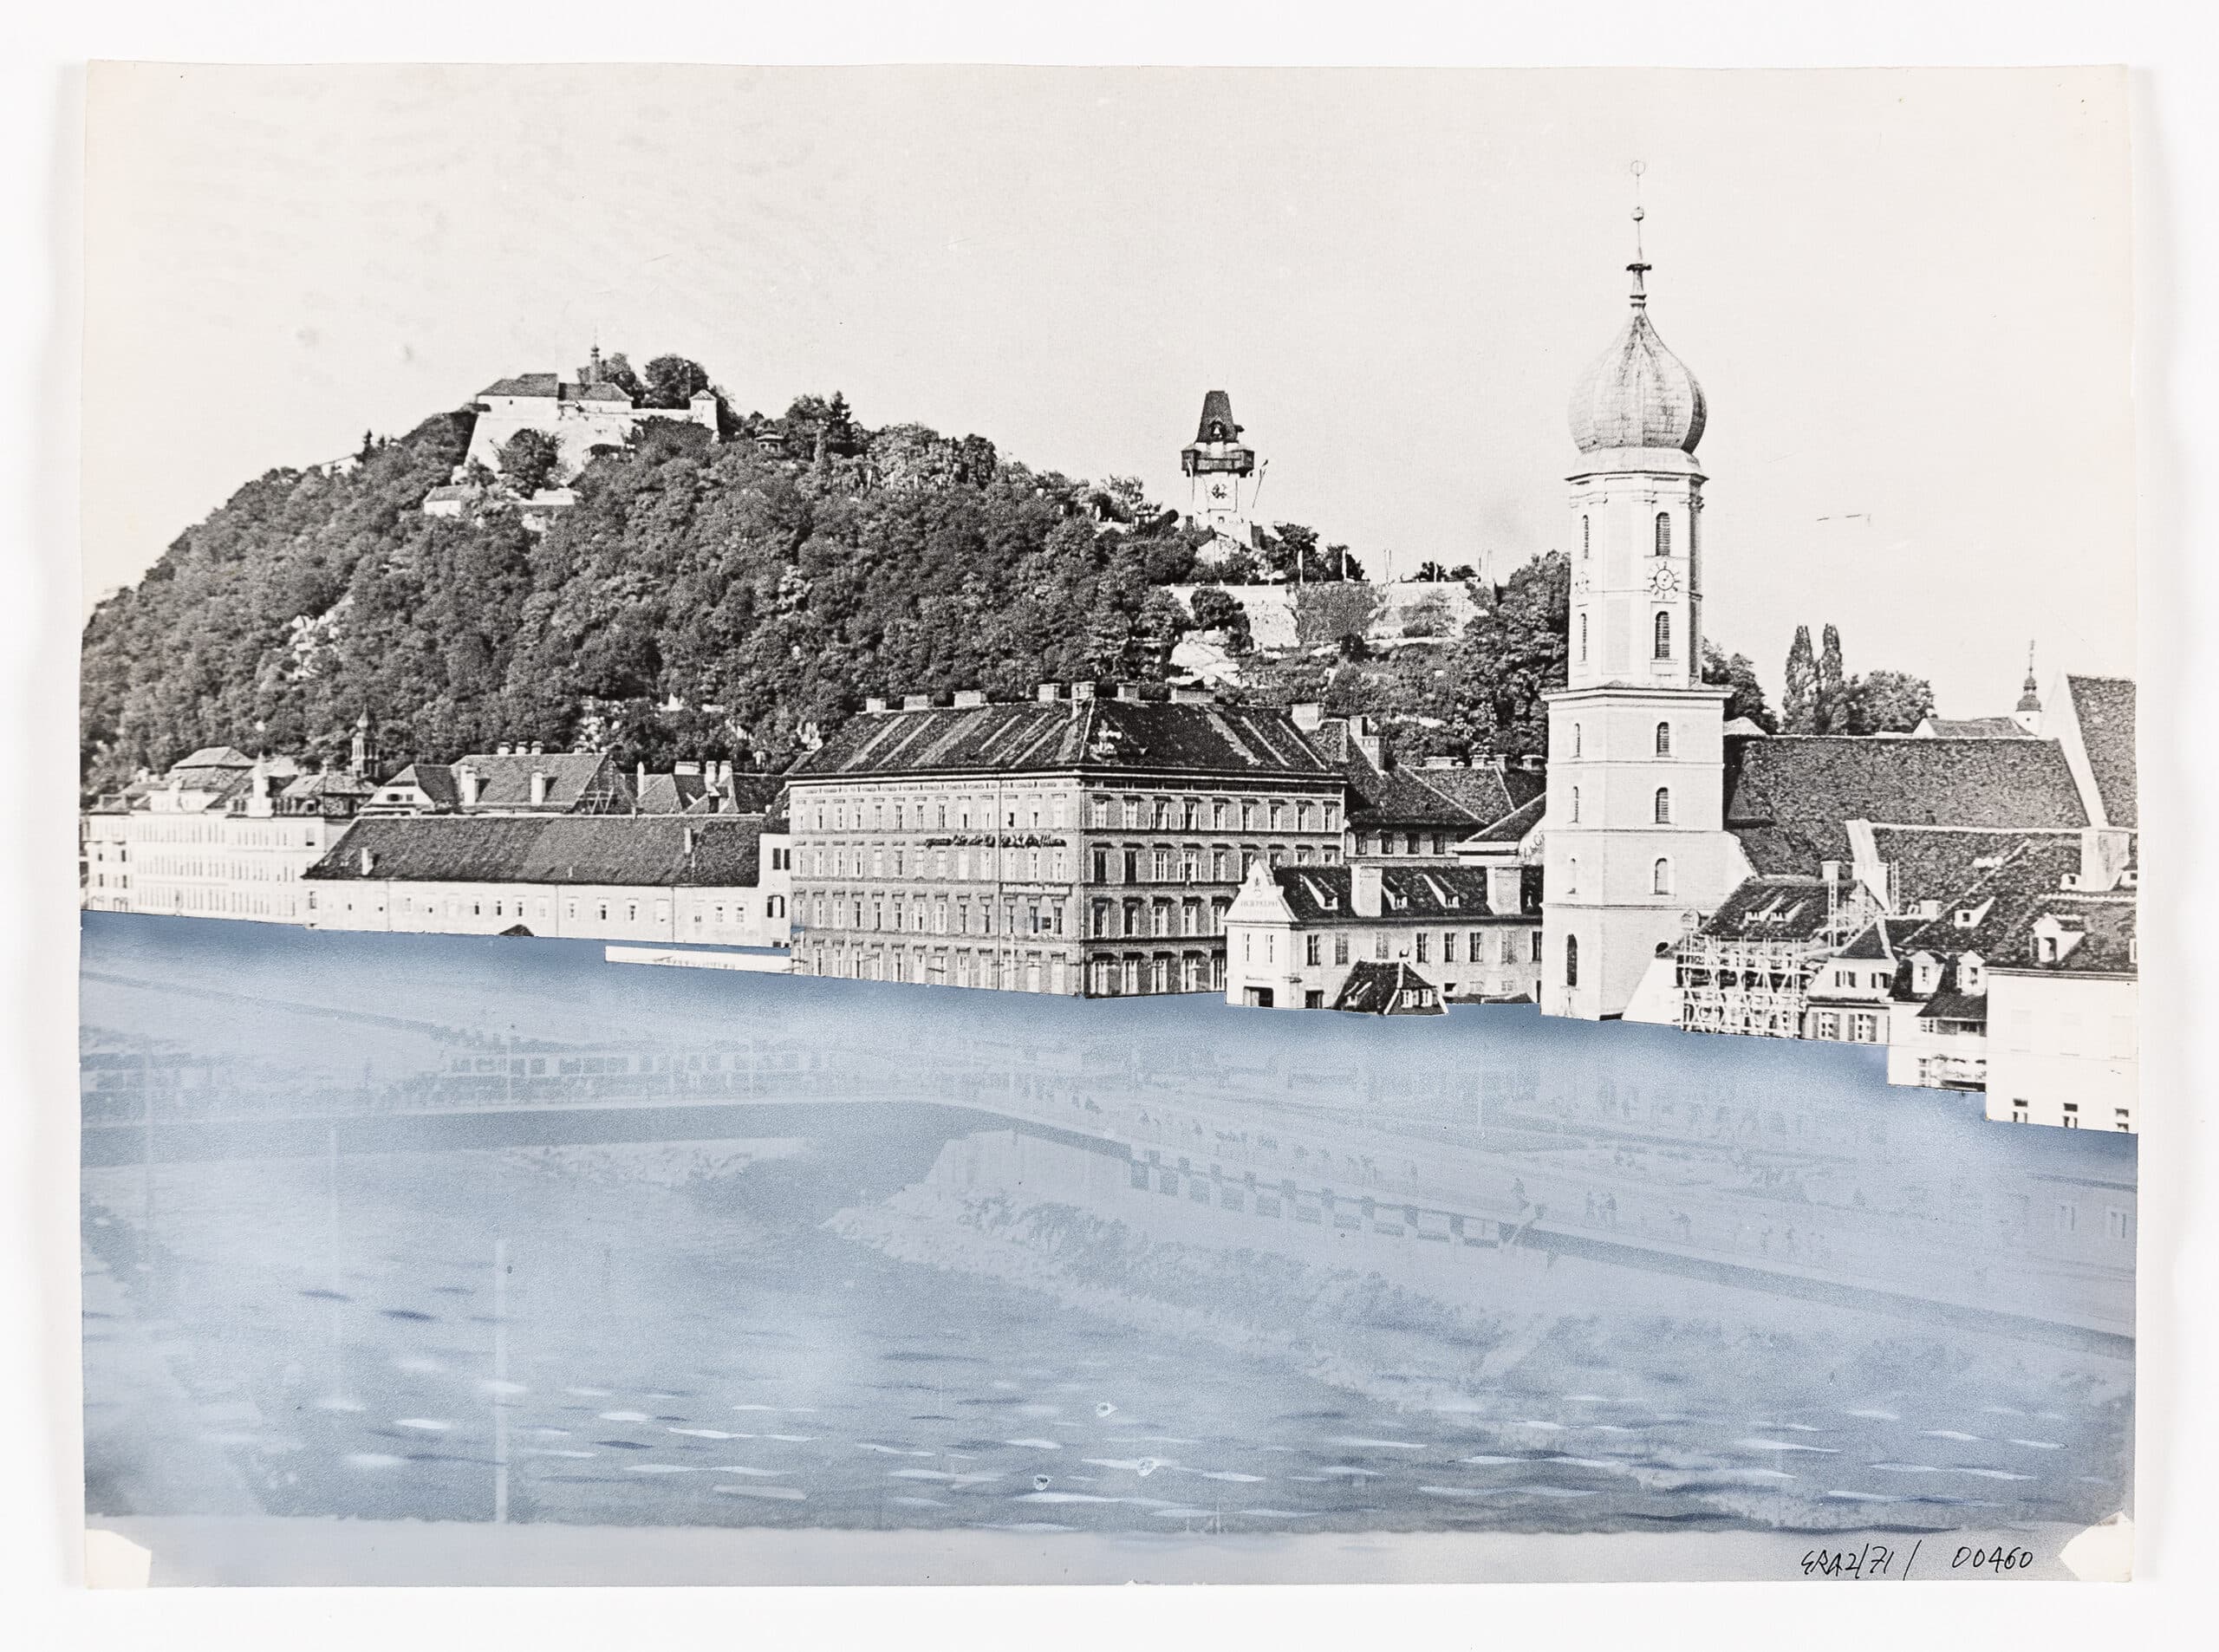
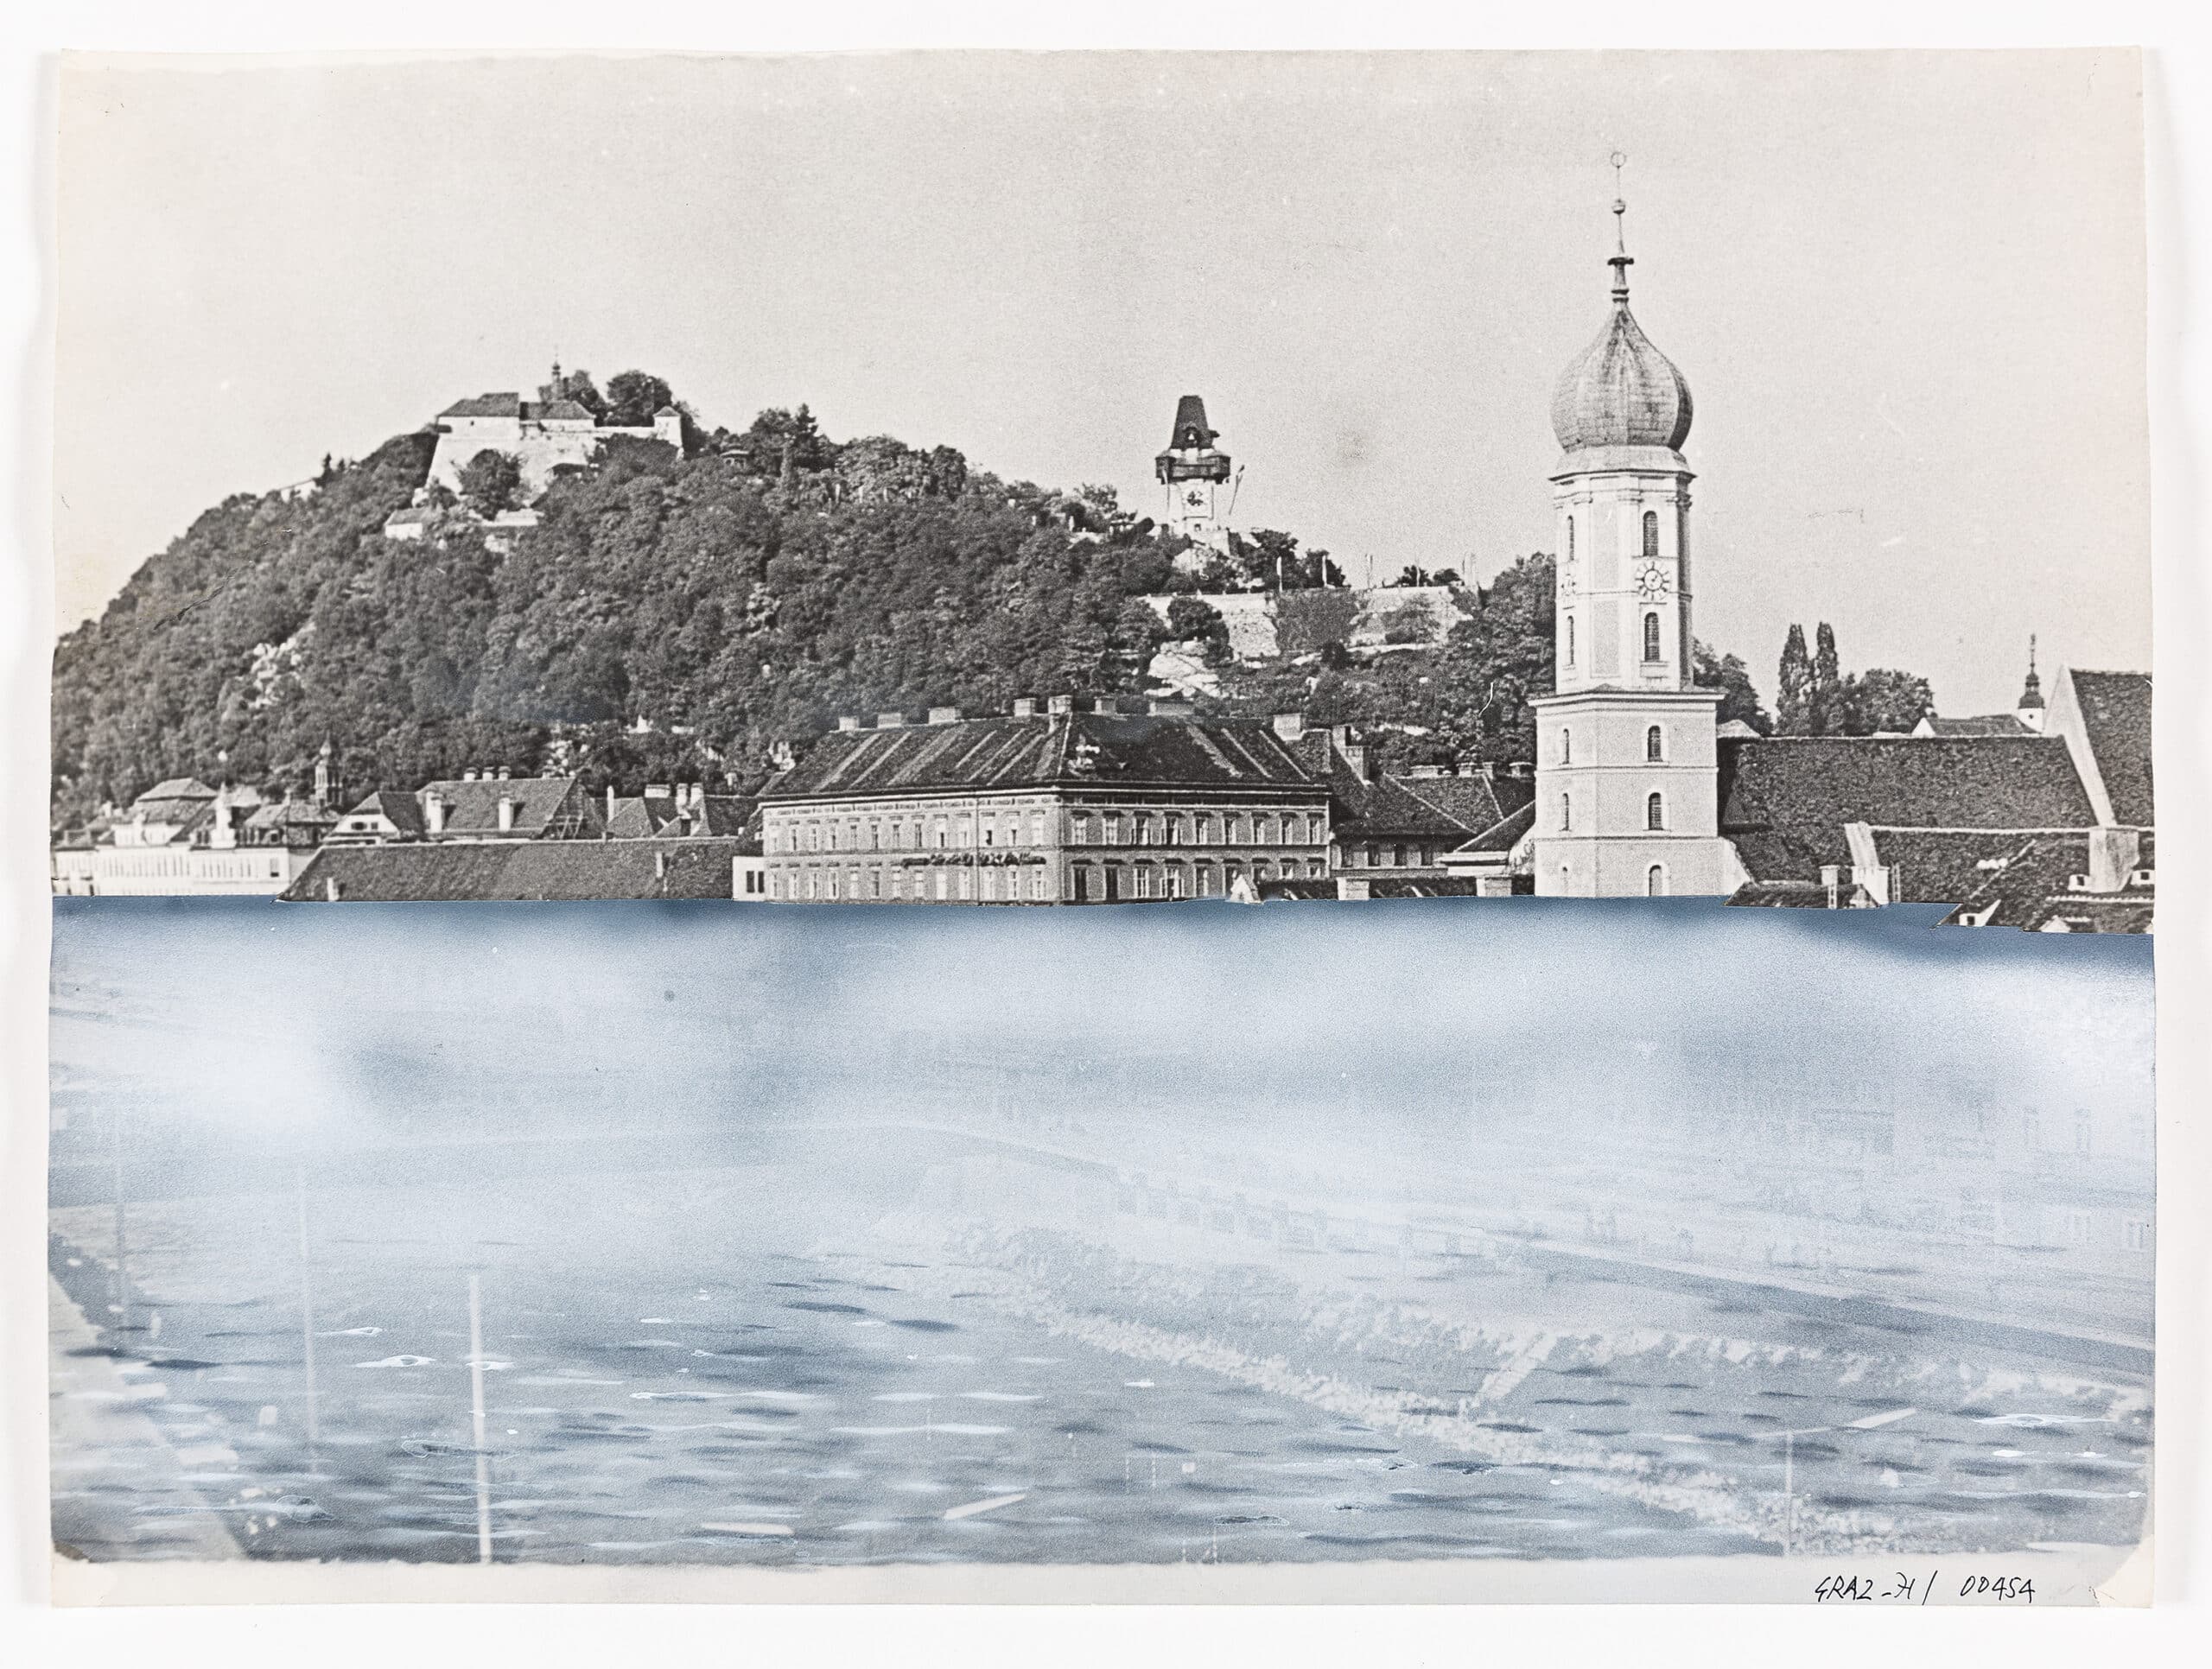
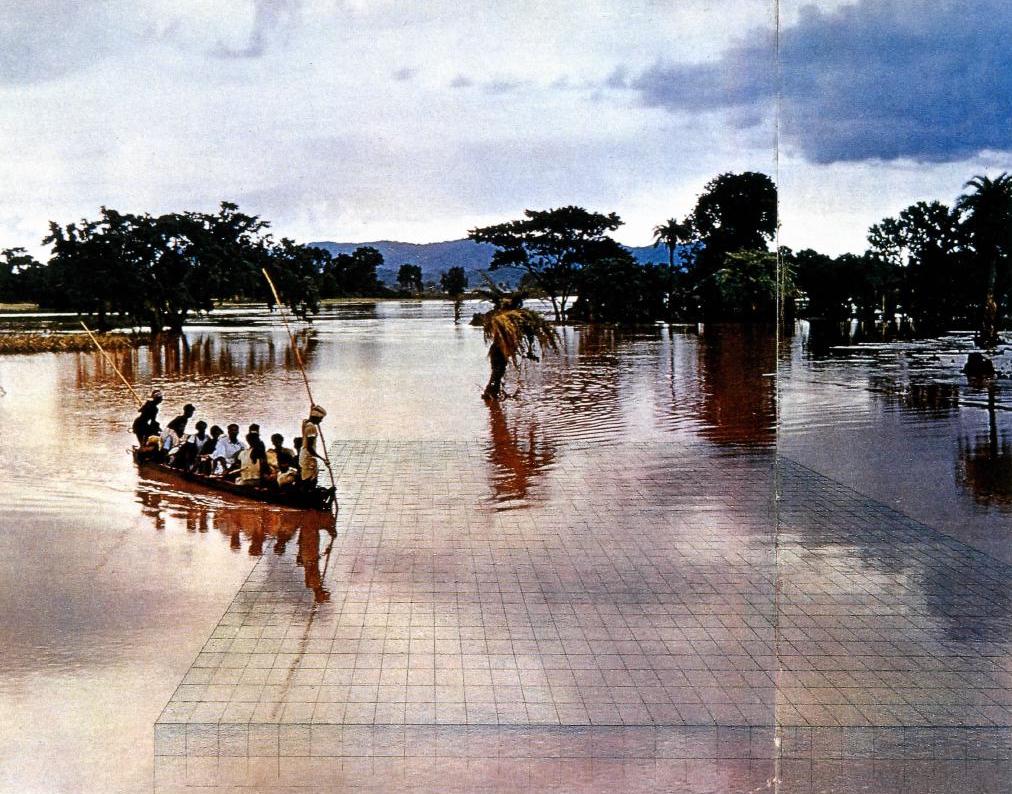
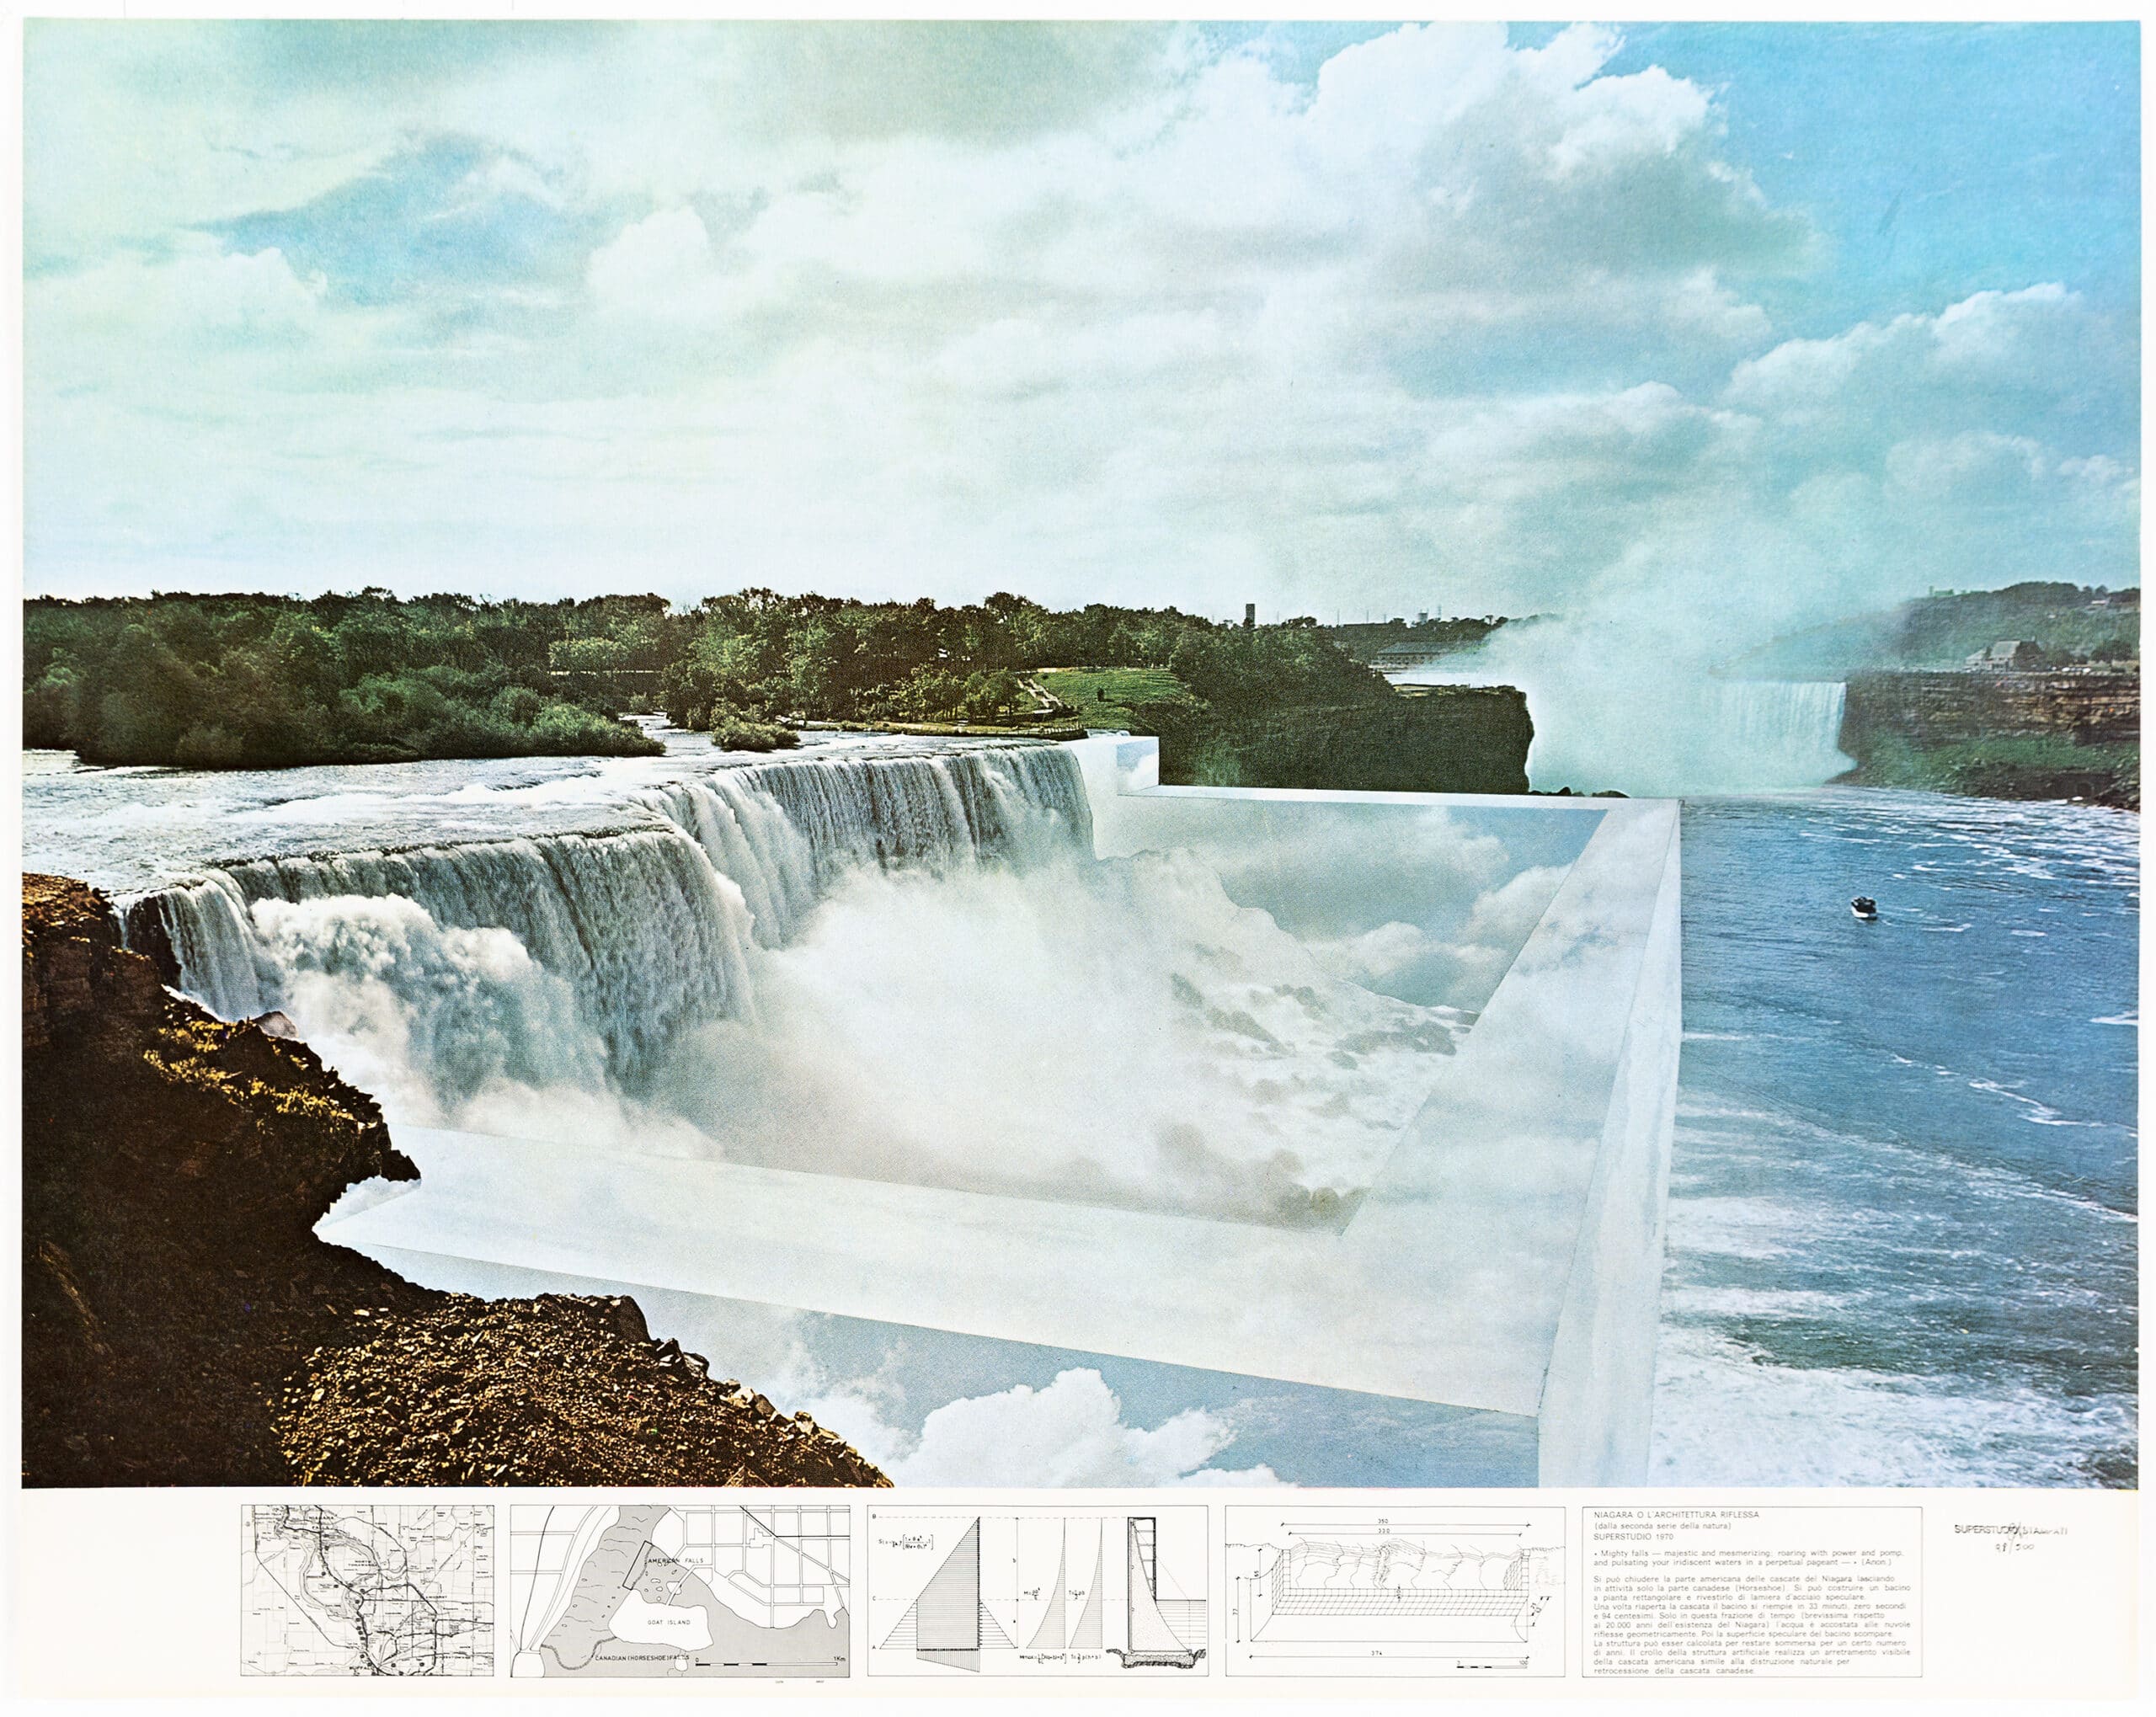
A fascinating way to find it is with reflections in the water. The horizon line passes directly between a detail and its reflection. However, it isn’t always like this; the rule applies only to objects far away, as it actually identifies the reflection point coinciding with the horizon infinitely. You might think that producing the reflection of an architecture would be easy, like flipping a picture from left to right and gluing it on the reverse side, but it is not like this. This applies to a plan, an elevation, but not for what lies behind – objects in perspective. In one photo, I had to consider how the flooded city of Graz’s protruding spires appeared. The reflection is actually a mosaic: the pieces have been recomposed where the line of the roof ridge disappears, like most of the domes too.
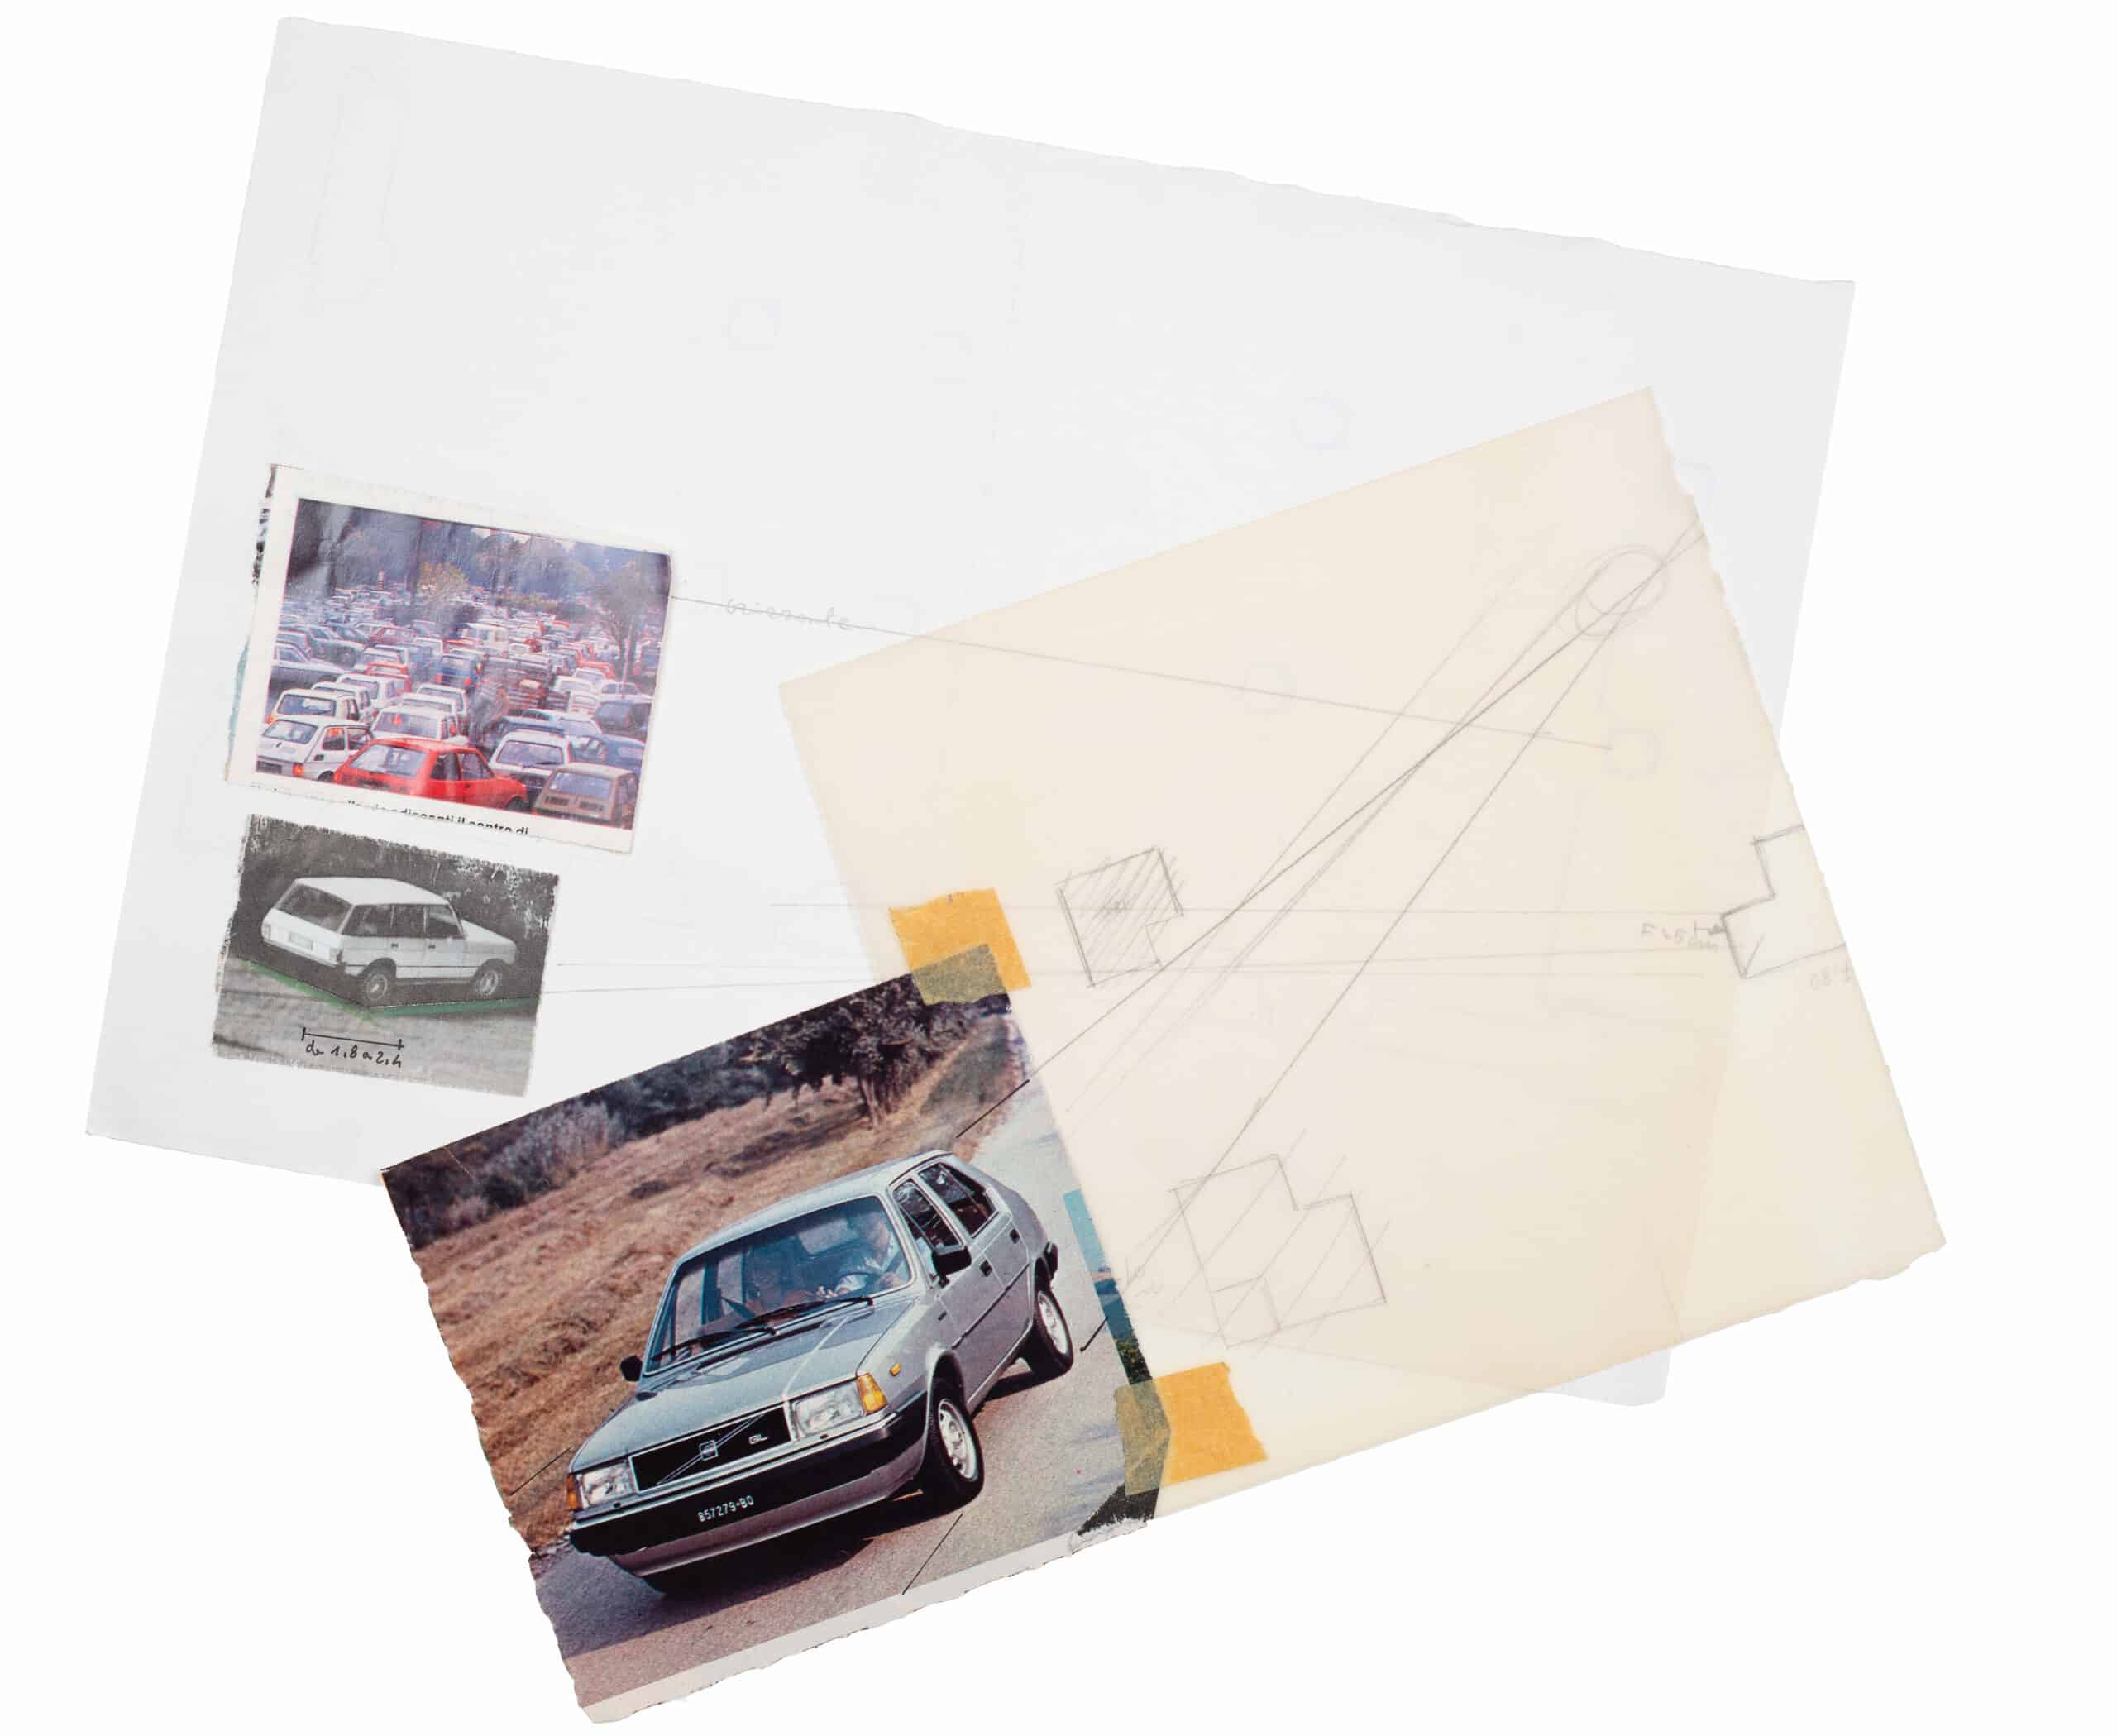
Once the horizon line was found, we built the object to insert. Usually at that point we covered the image with some tracing paper and placed the object in the perspective, adapting it to the context and paying attention to what it covered and what covered it. Then we photocopied it, while for simpler objects the perspective was traced with carbon paper. In certain cases the halftones were red, simply because, with the black and white copy technique, we would have obtained the right tone of grey.
The second part of the job was addressed by personal sensibility, rather than perspective rules. It was necessary to understand which was the dominant colour in the starting image, so that the colour palette could be adapted to it. In particular, it was necessary to study the shadows in the starting image to neatly reproduce their inclination, while trying to figure out if the shadows would be illuminated by bright surfaces nearby, if there were reflections.
And finally we coloured it with pencils or the airbrush, the latter being much slower and more complex. It was necessary to cover the image with paper or screens, to be removed a bit at a time, starting from the areas we wanted to be darker, up to eliminating the masks covering the lightest spots.
For a selection of montages, following more or less the order of realisation, we used different techniques.
This first is for the Continuous Monument. Sometimes we used to make weird jokes. Another montage, for example, was made by using the leftover background from the previous one.
Another was made by directly overlapping the tracing paper over which the drawing was placed.
And a fourth instead is made with a self-adhesive halftone. The high-lights have been gained by scratching it with a blade.
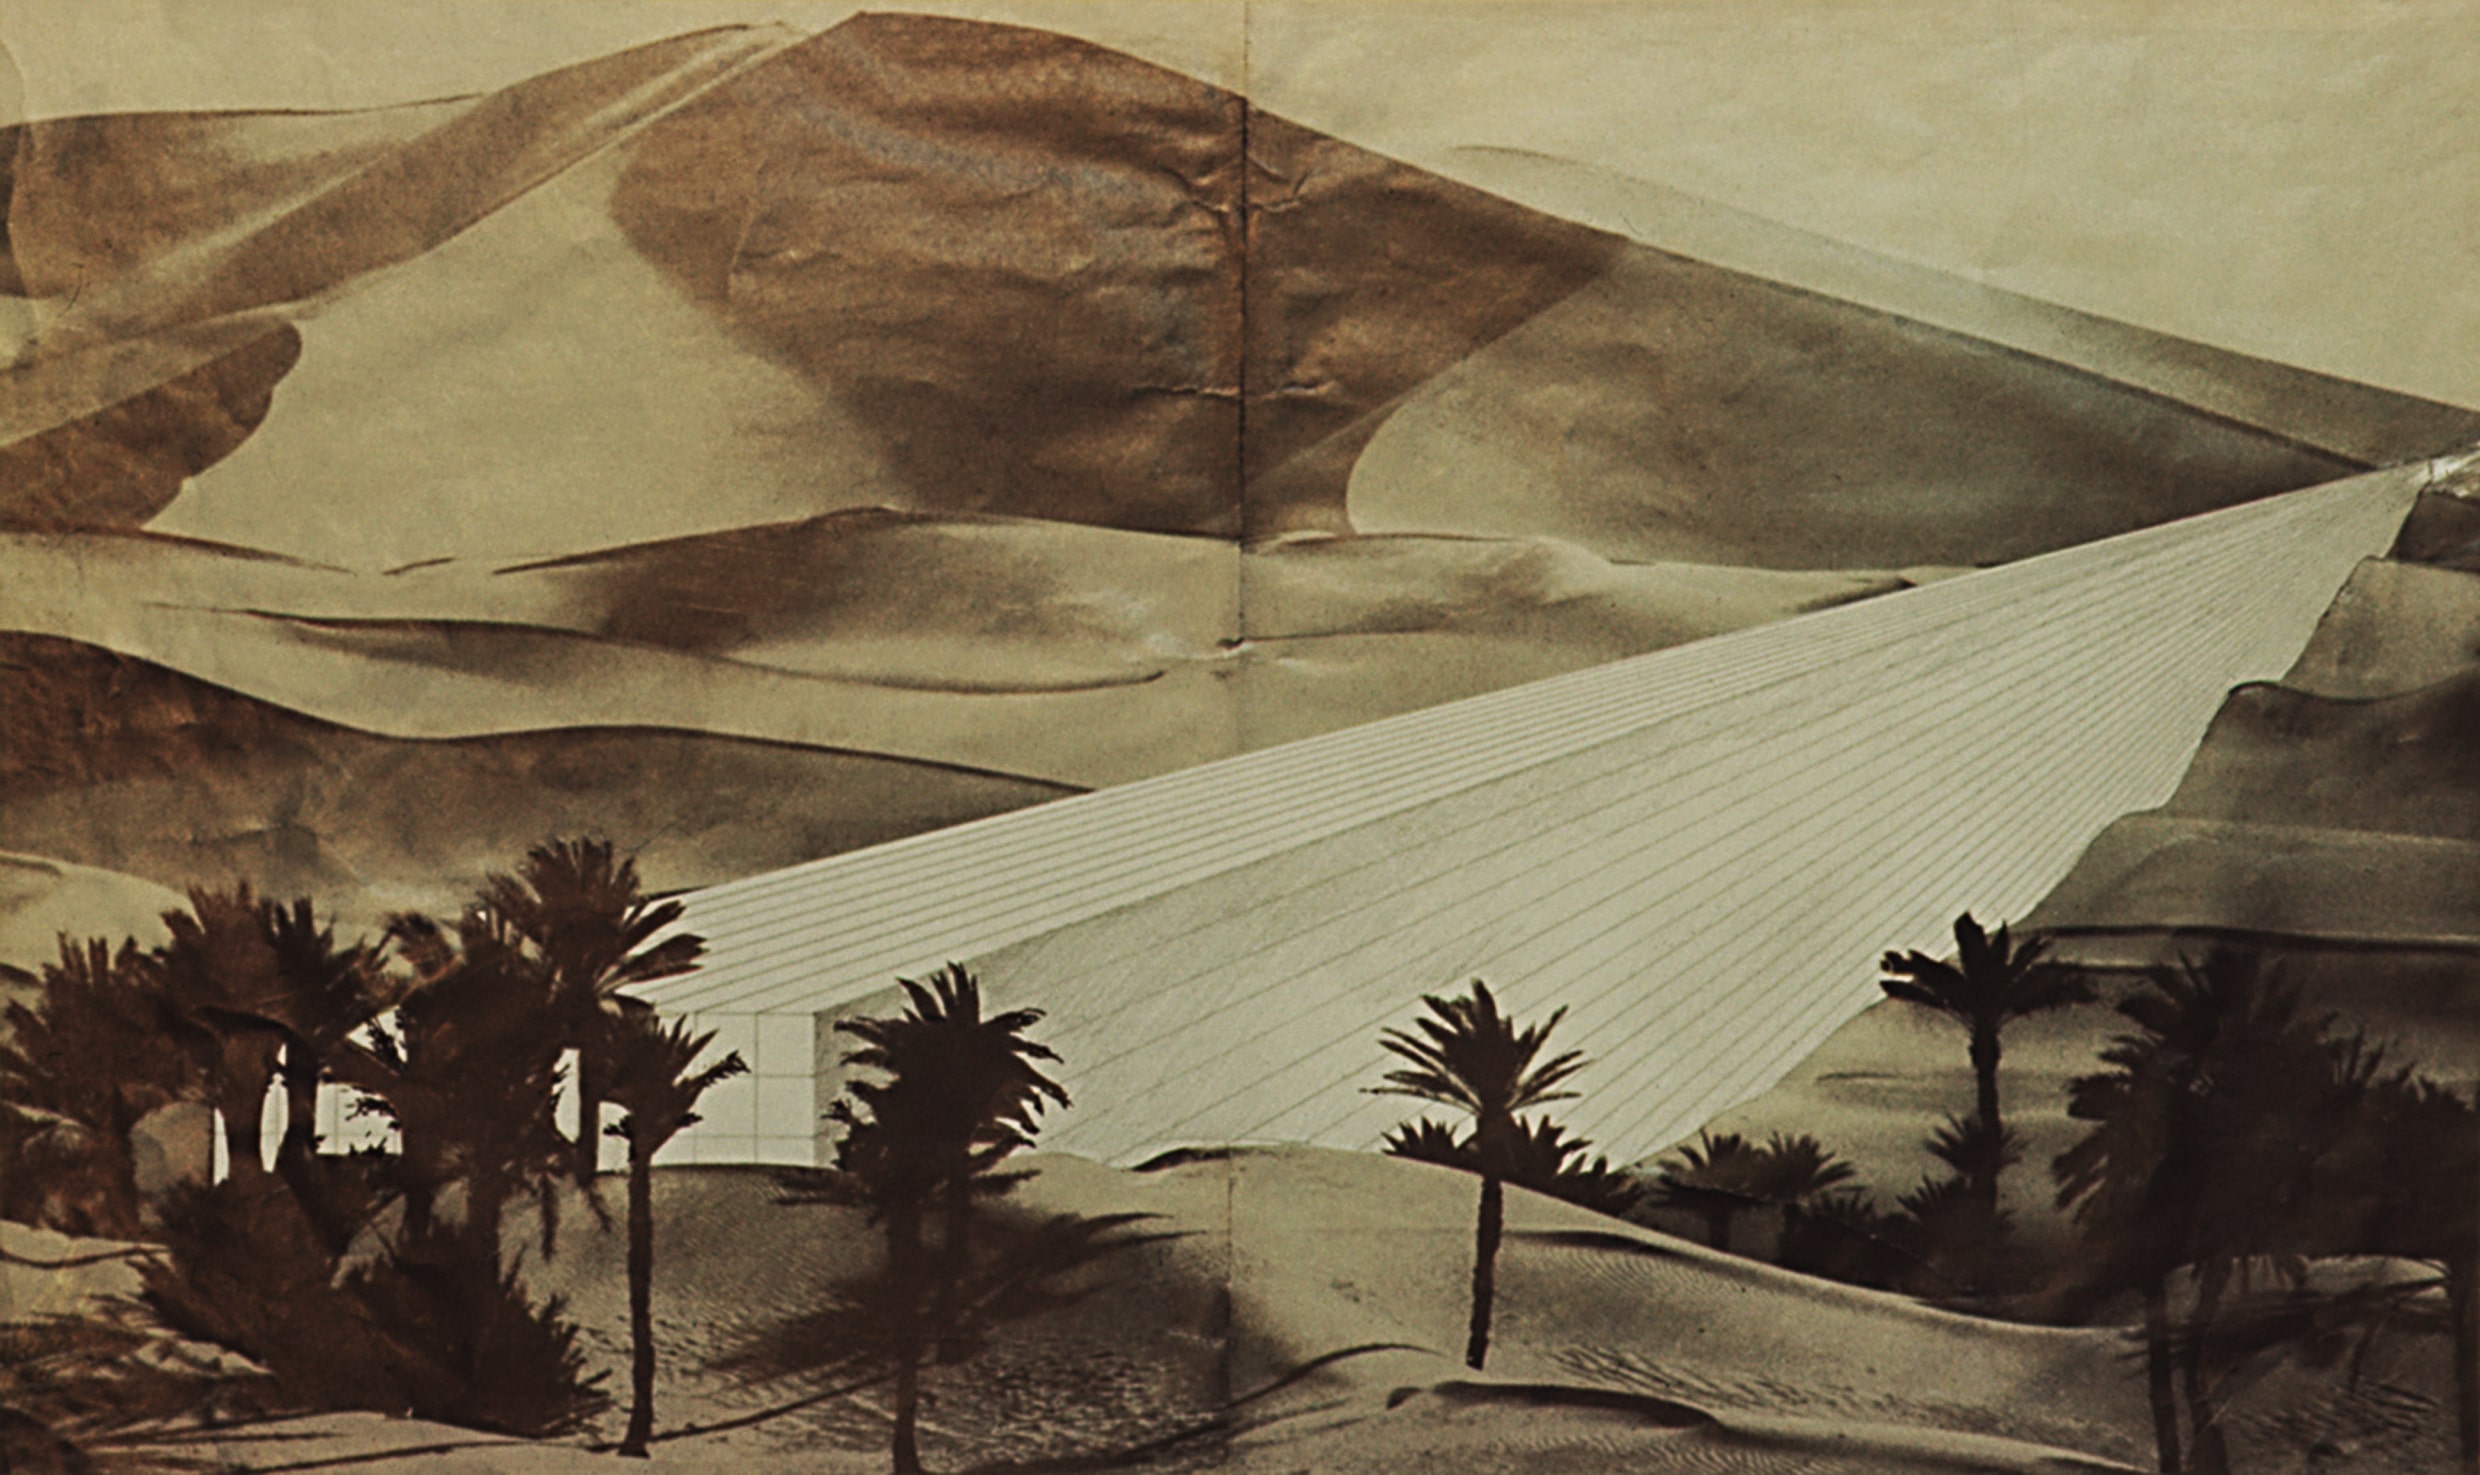
At a certain point I was truly tired of making collages about the Continuous Monument and I therefore decided to sink it. The image is made directly by drawing with pencil on the photograph.
As it happens, that project remained unfinished due to the lack of functional images, or because of insurmountable technical problems.
One montage is a posthumous Continuous Monument made for a friend, already conceived back at the time, then realised only when I found the right image. And another was also made for a friend. A joke or maybe a feeling. Sometimes the found image was already good as it was, only requiring a title.
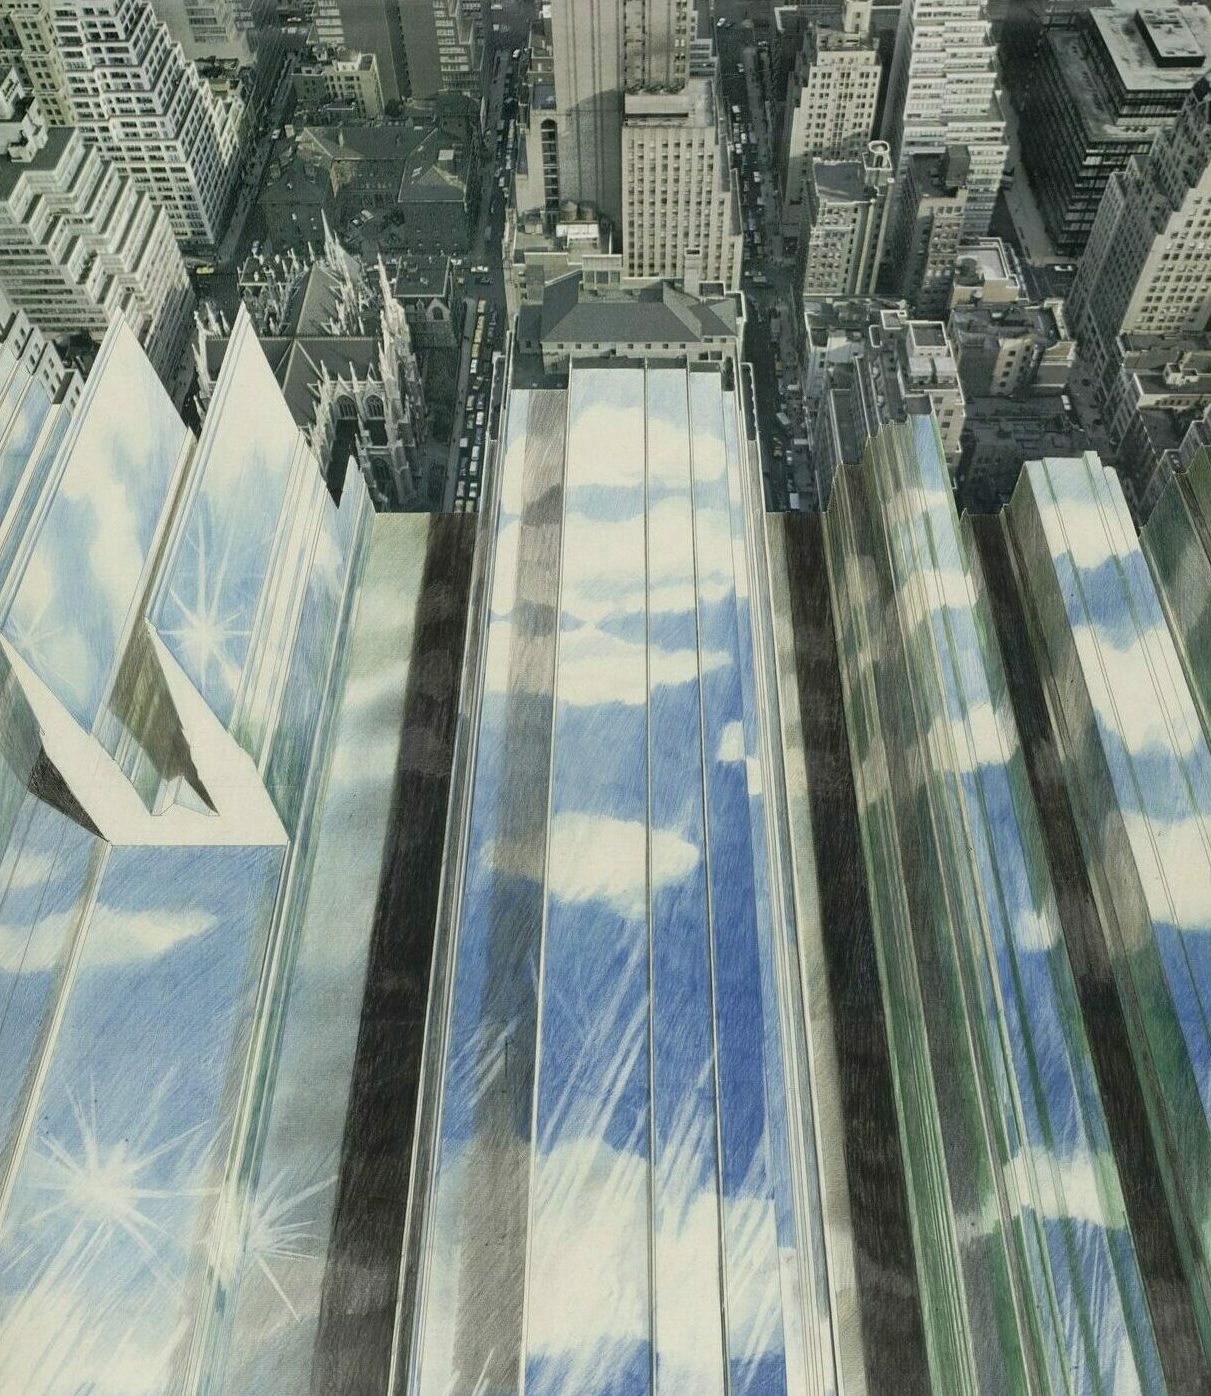
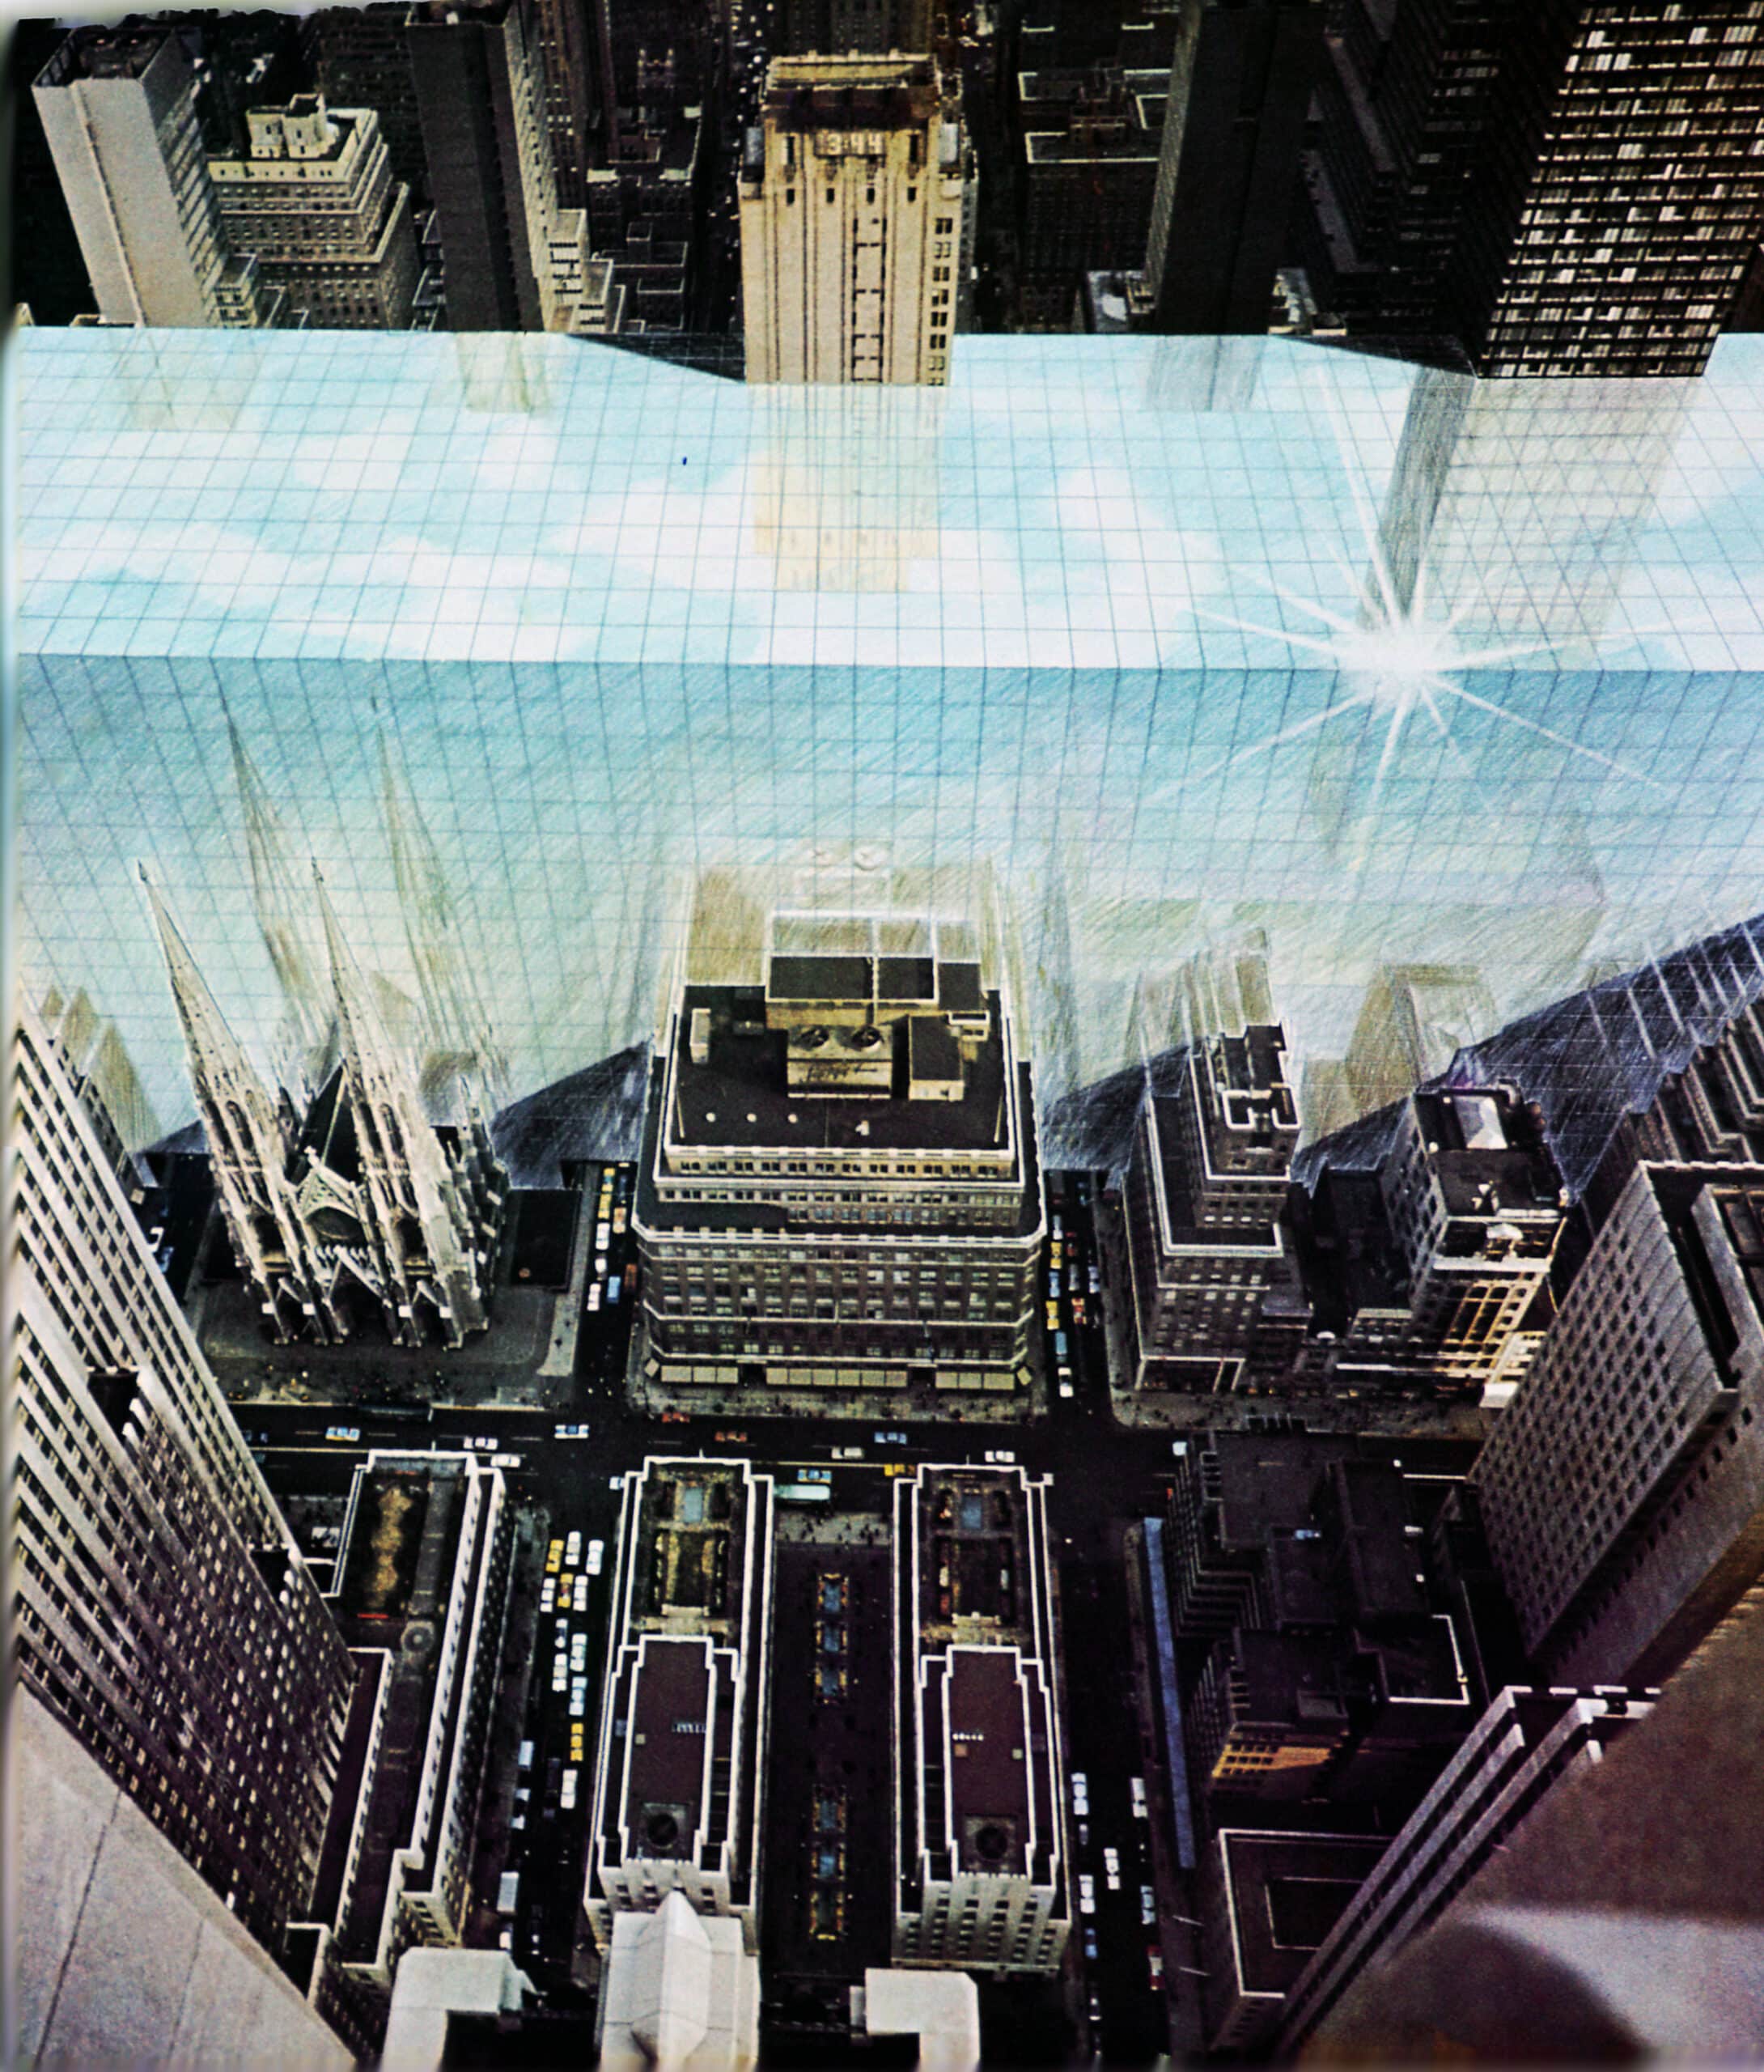
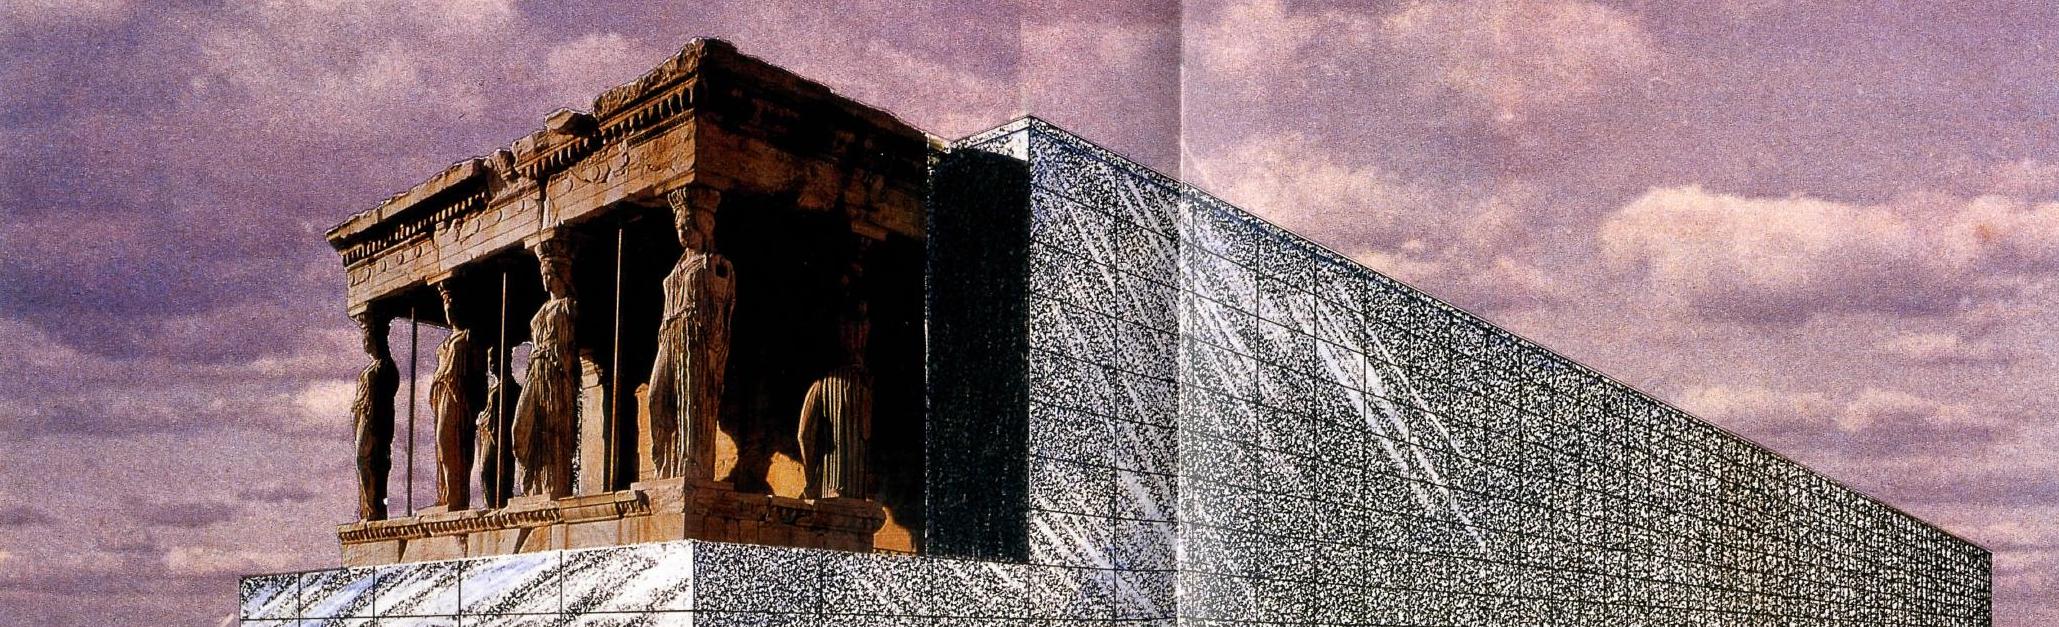
The Continuous Monument was then followed by the short phase of Architettura Riflessa often realised with pieces of sky from the image itself or other images.
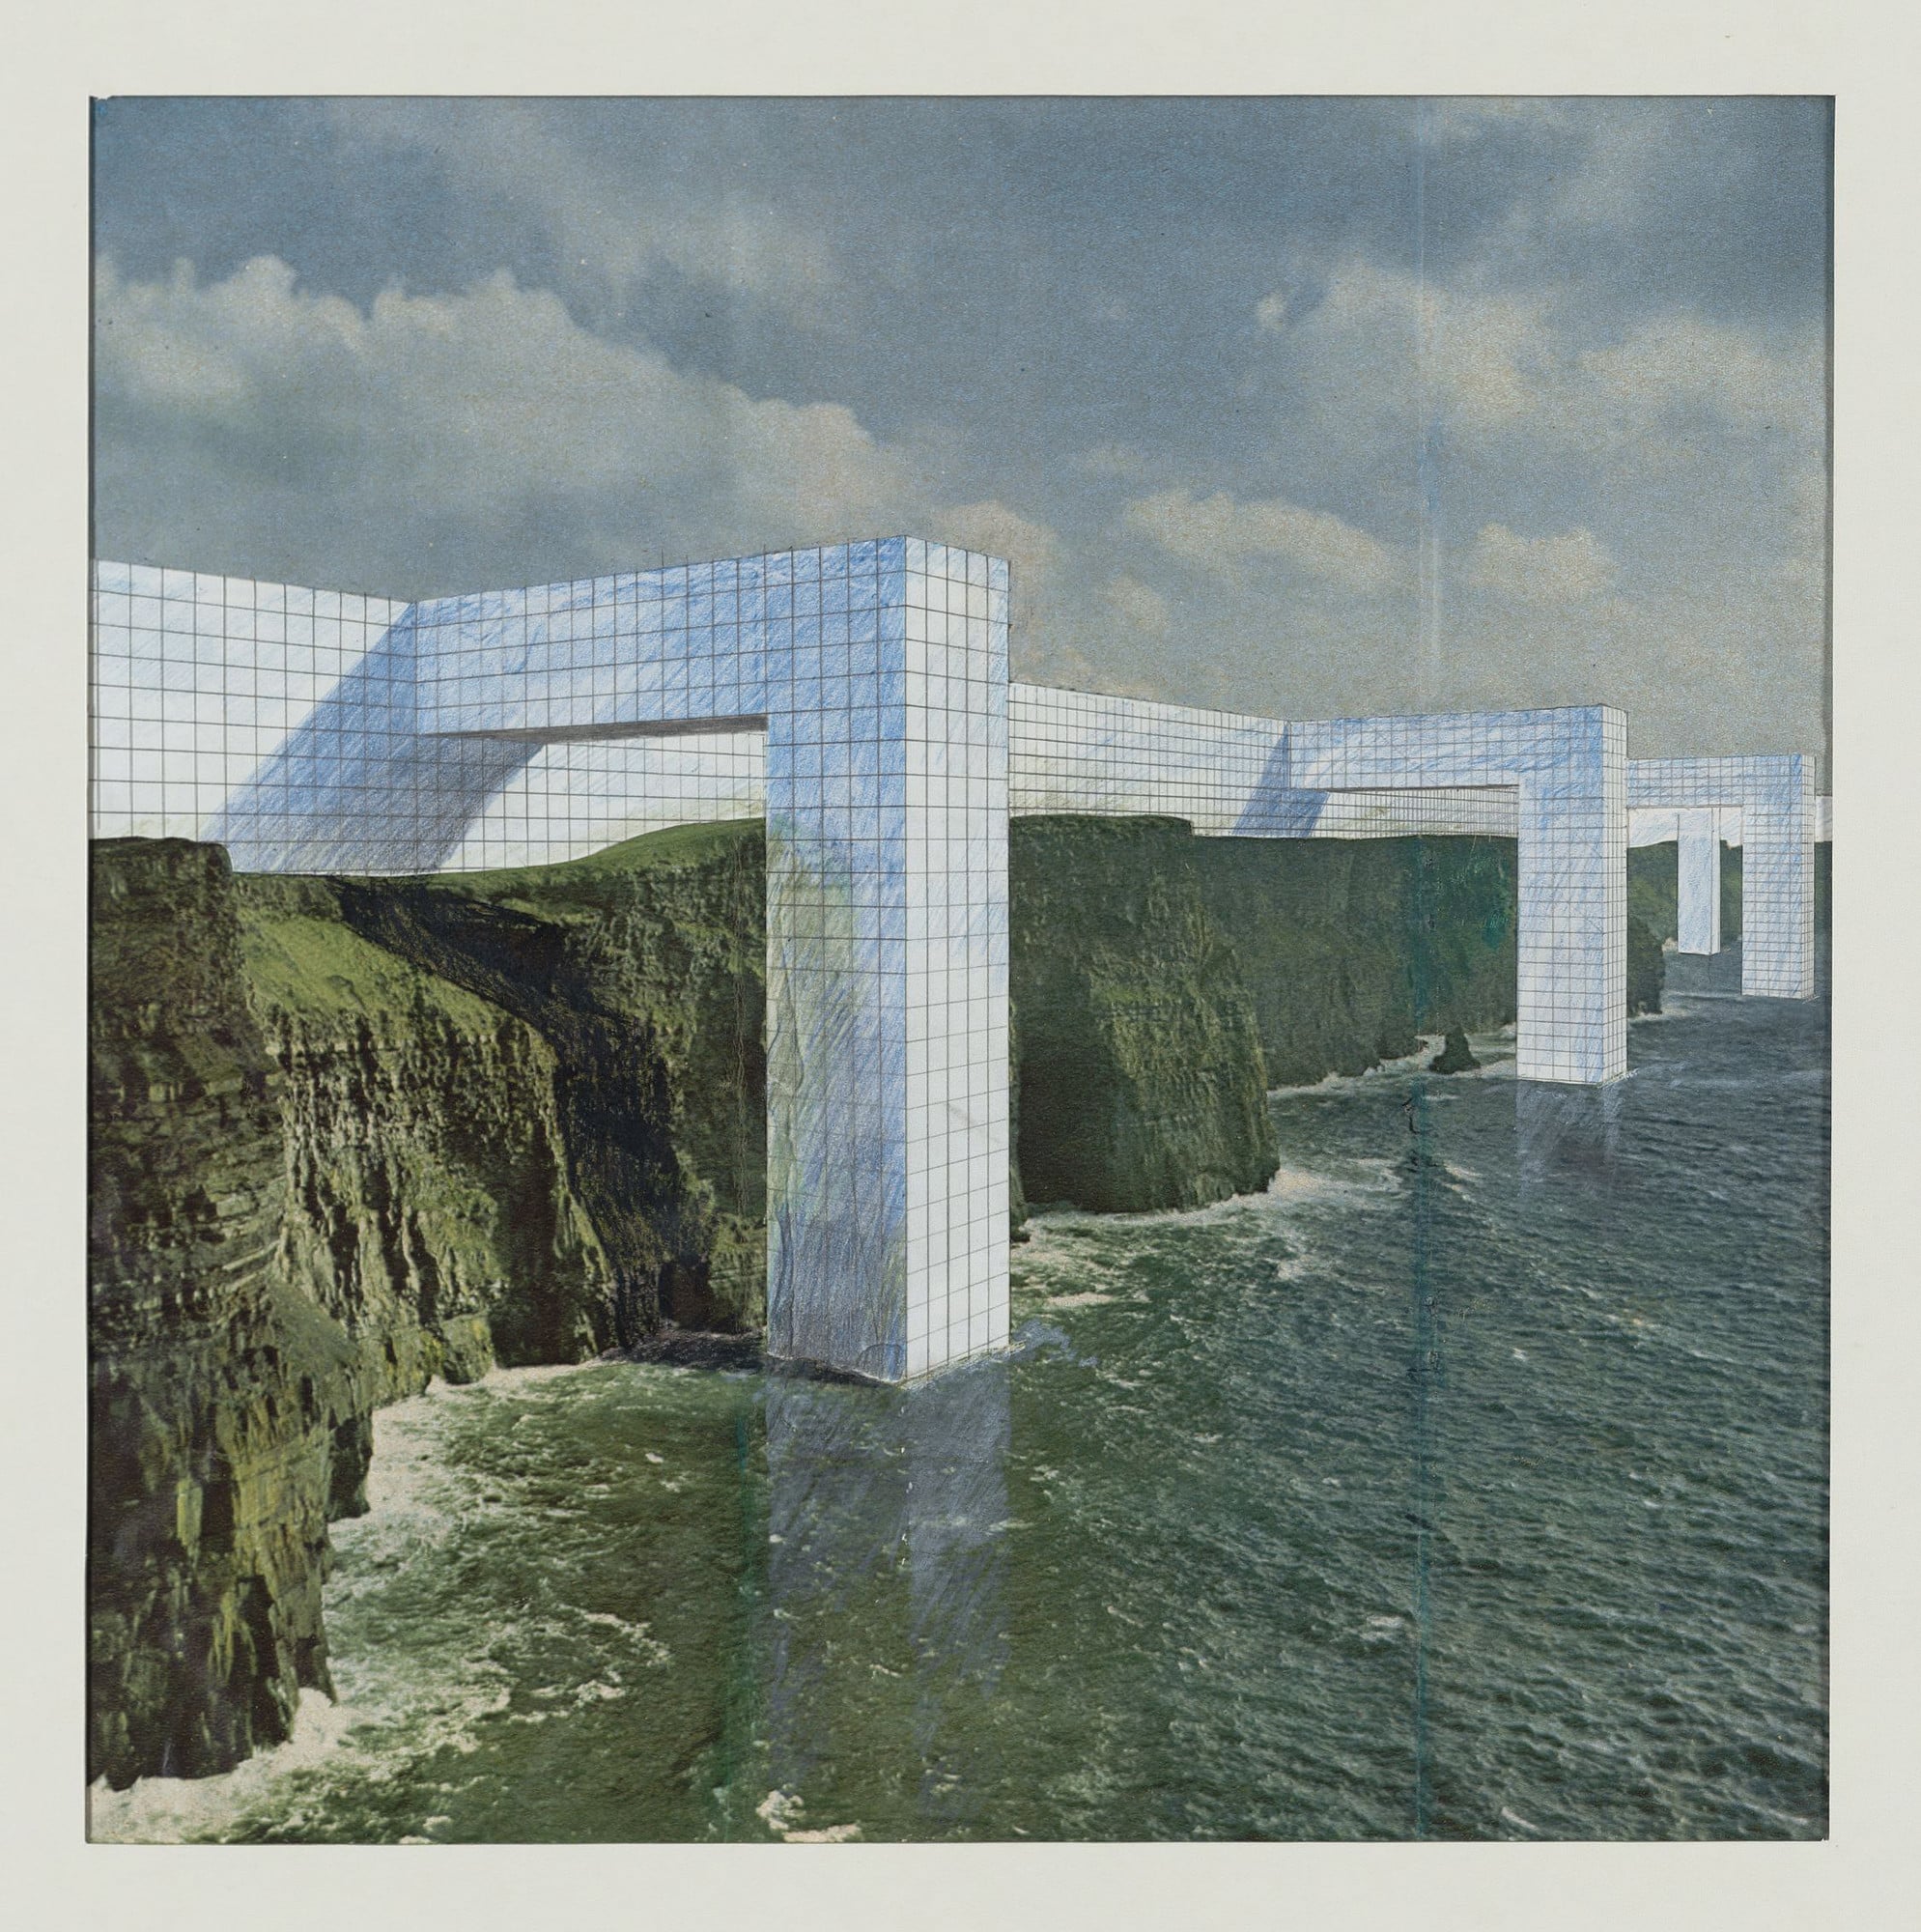
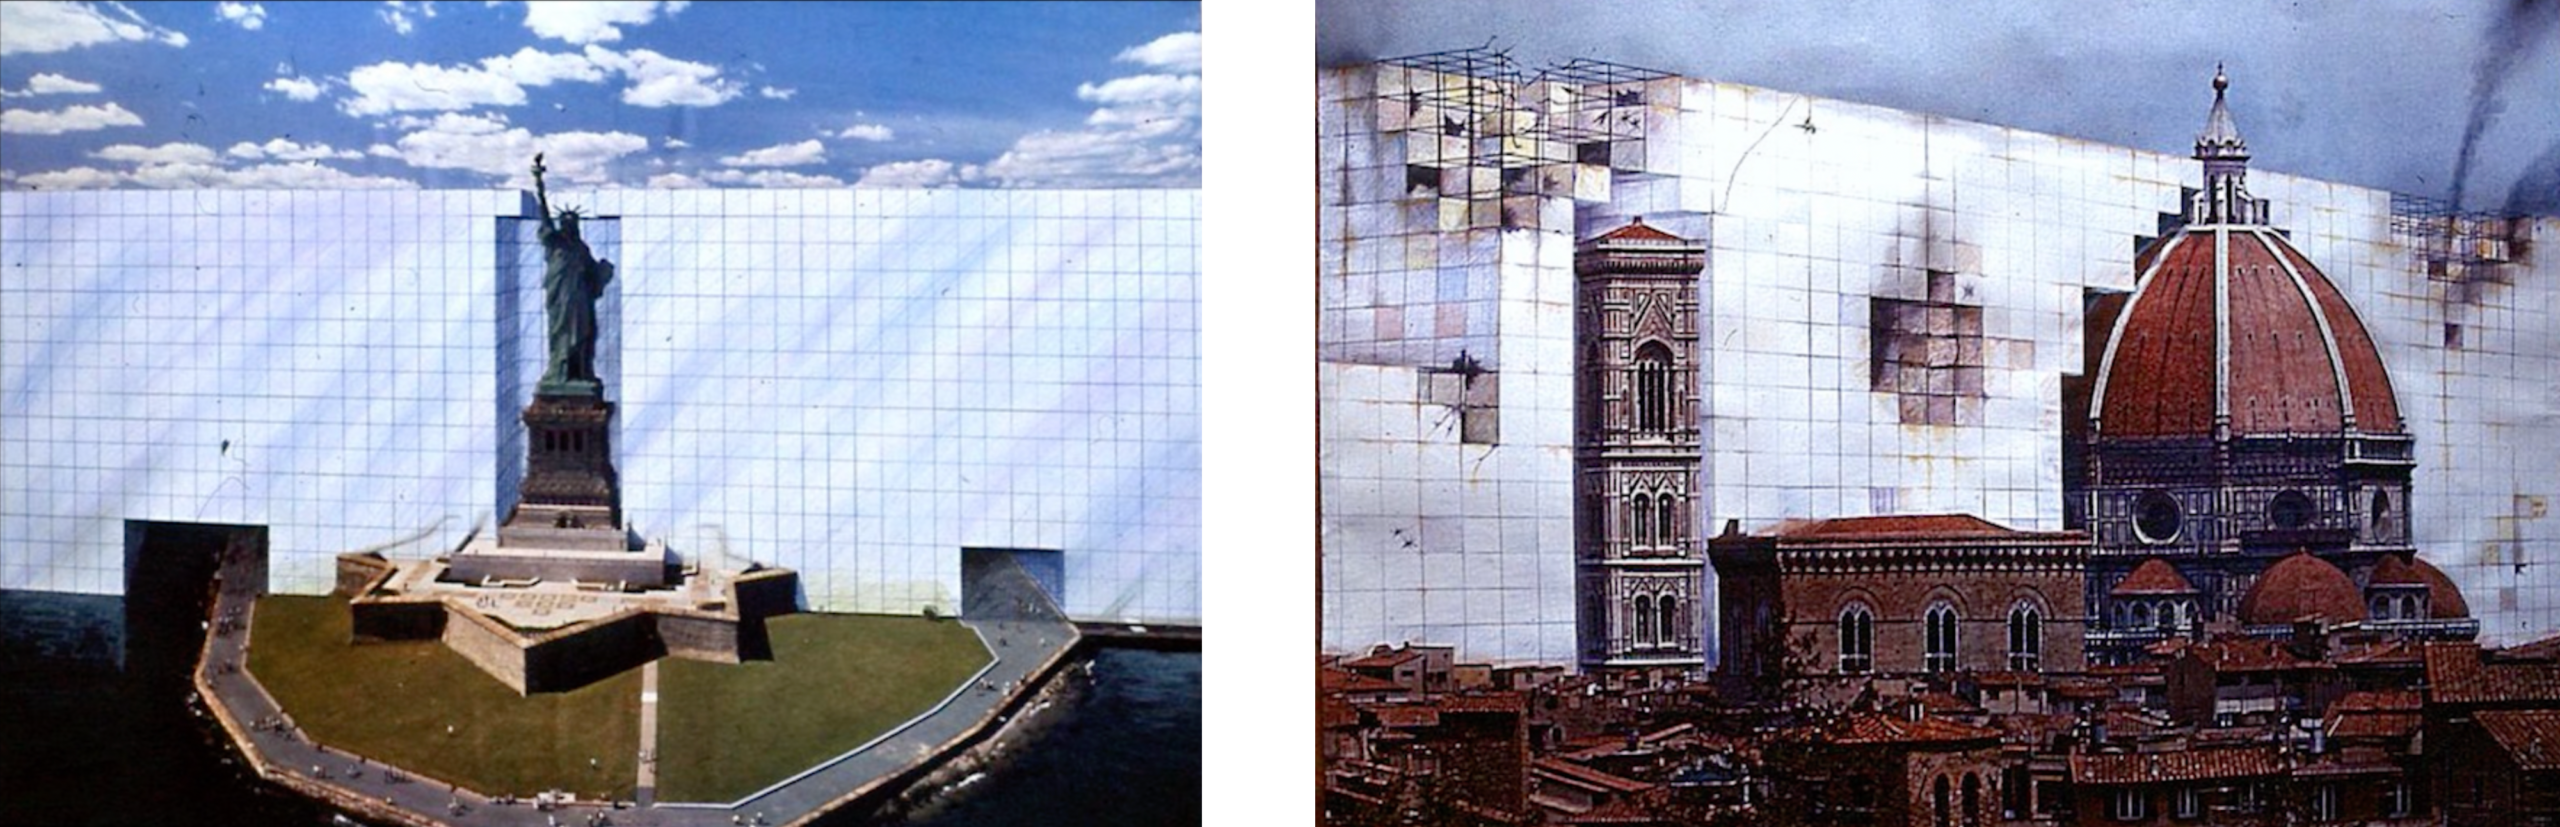
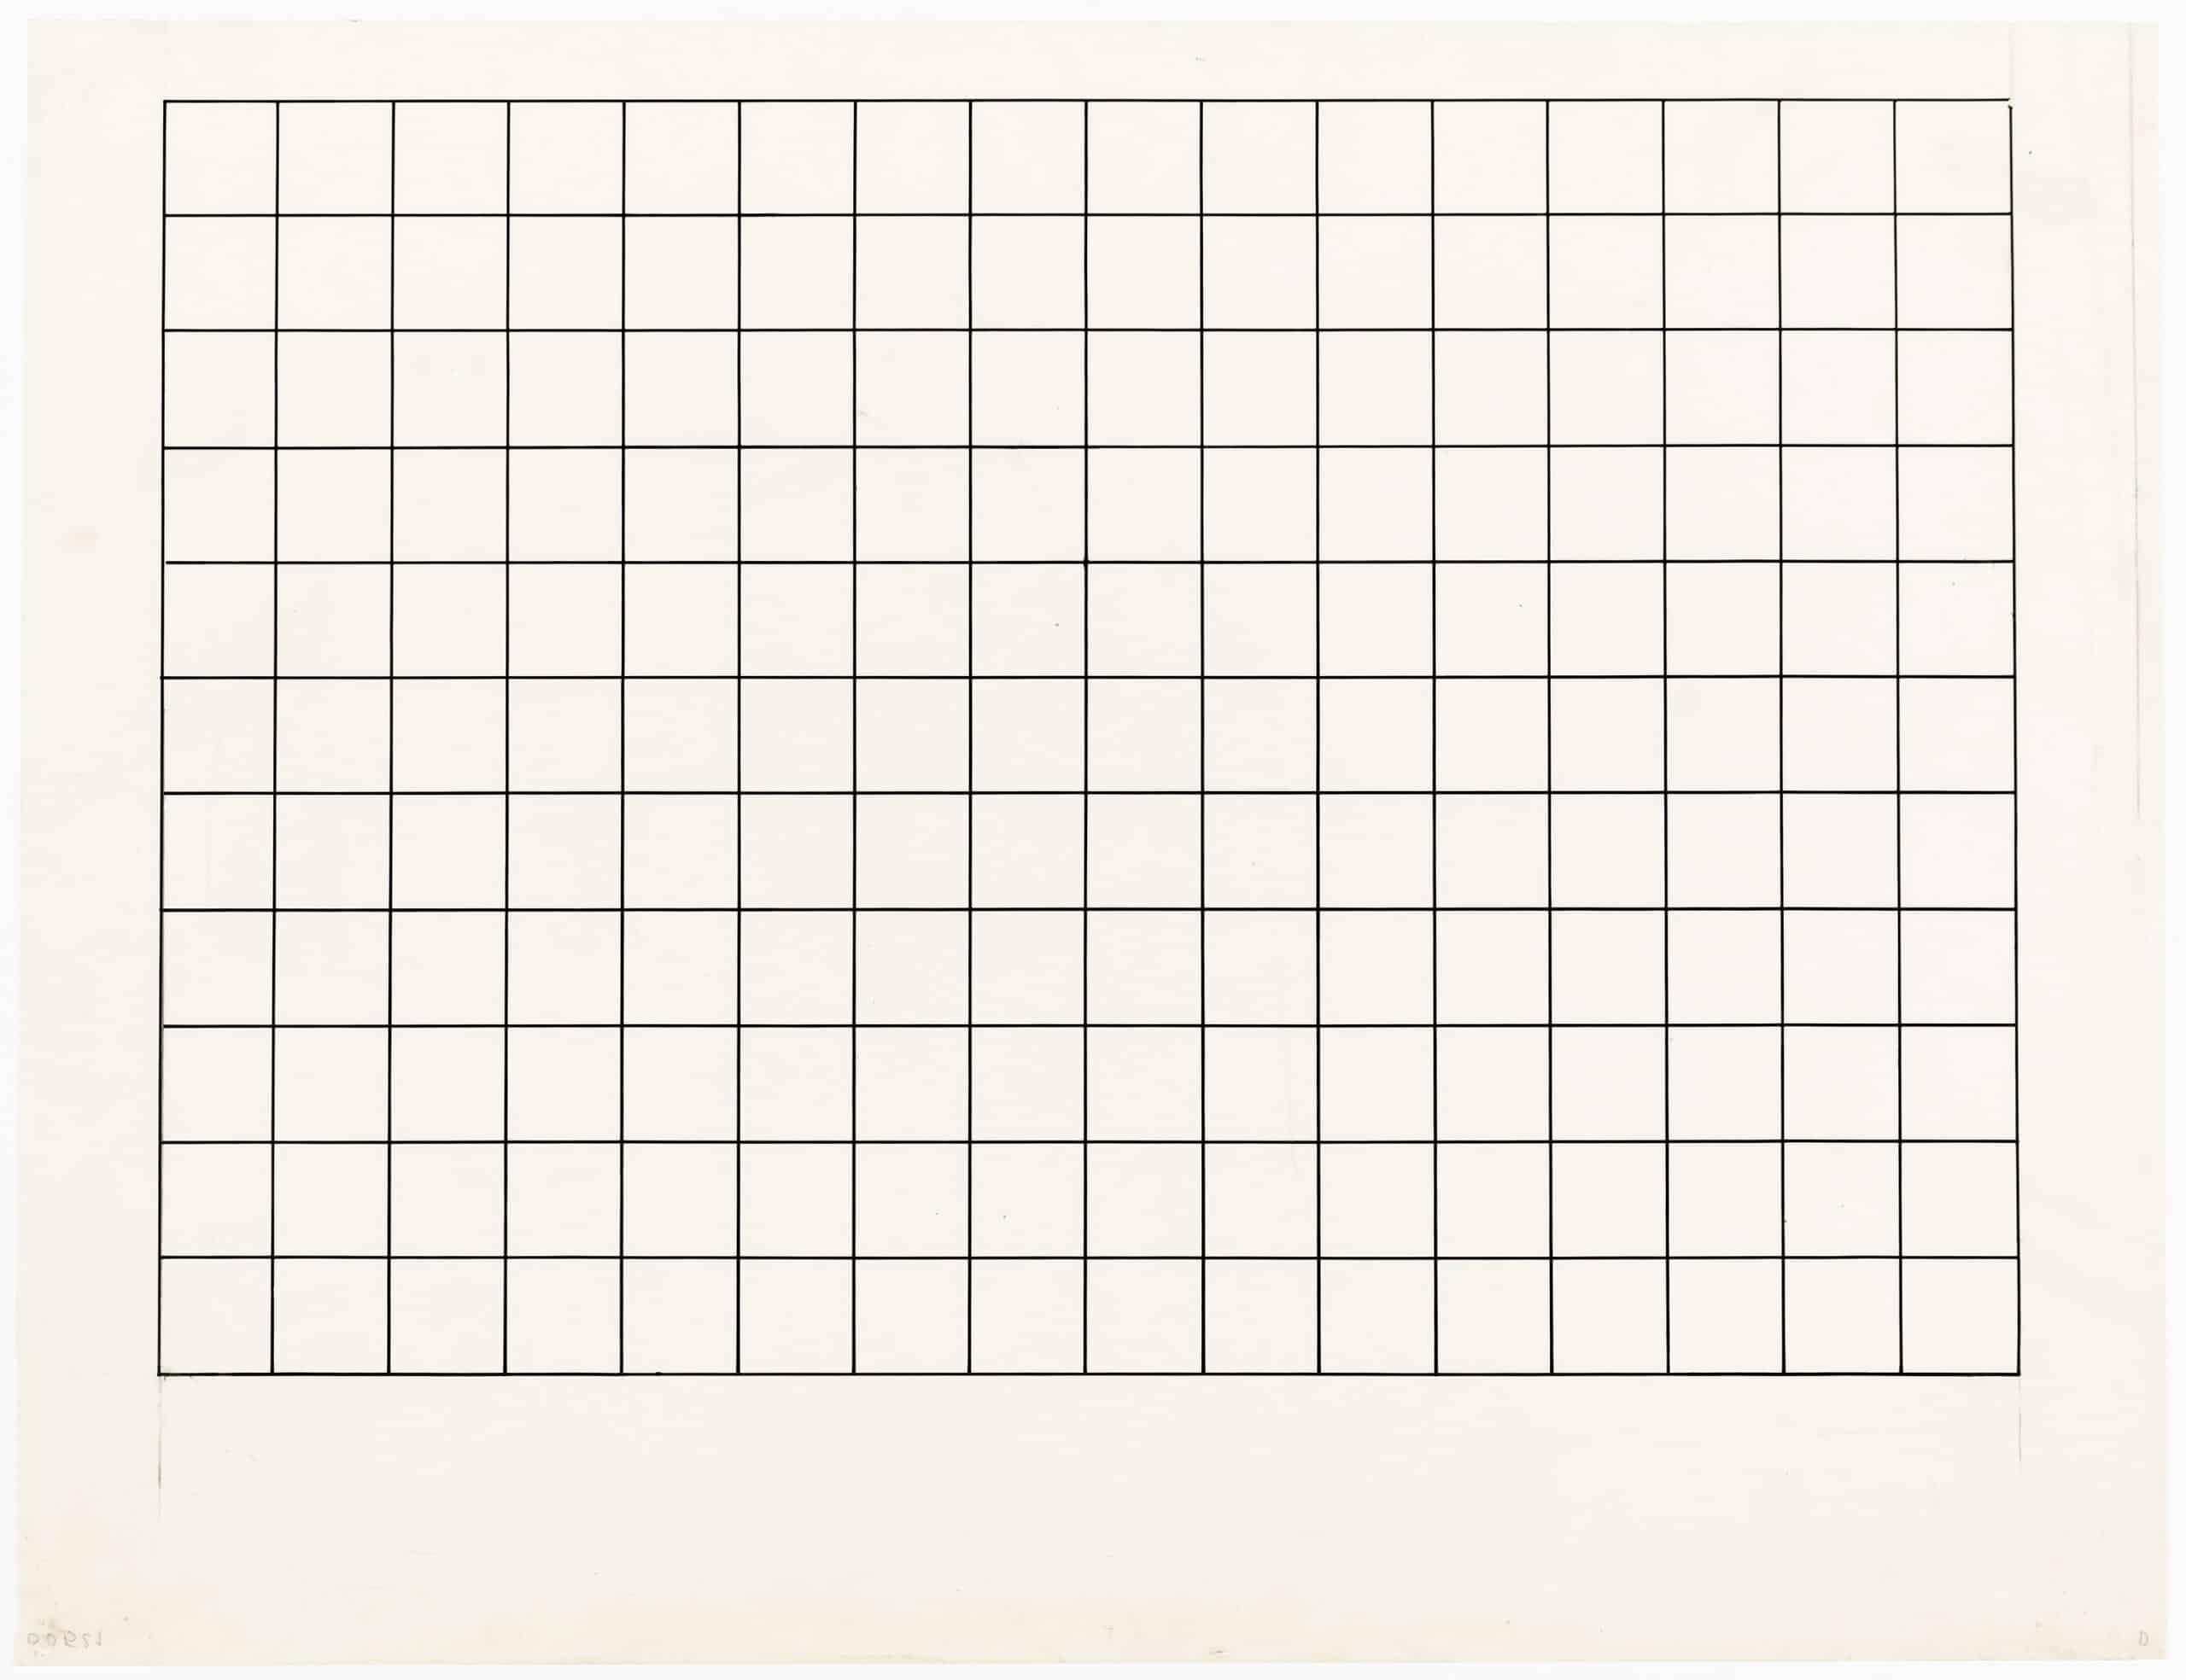
Several times we’ve been asked how the squaring-up invention happened. It came from Adolfo, but I think it was inspired by the technique I used it for the montages of the Continuous Monument, a synthetic perspective method, the one of cutting.
The first ugly montage of the Continuous Monument (I can say it because I made it) was not squared. I found the landscape horizon line (here it was randomly placed), I chose on it the vanishing point to set up the perspectives and give it shape with a series of parallels. Then to insert anything along the wall the quickest method surely wasn’t the complex one of using measuring points; all that was necessary was to draw the first estimated vertical by eye, then to create a series of squares – job done.
It is the method used by Leon Battista Alberti to give measure to everything positioned along the vanishing points. If you therefore create a squared grid along the Monument’s side, and the side dimensions are known, it becomes possible to draw anything you want in proportion. All that is needed is a diagonal on a square to start squaring the building surface. You then proceed by drawing the second diagonal and so forth. In the Continuous Monument, the squaring was used to draw the portals in a sequence. Then it was supposed to be deleted. But we didn’t delete it. The squares didn’t have concrete dimensions. It was just a proportional system: 3 cm and you had furniture; 3 mm and you had jewels; 30 m and you had a city. In some images you do have squares, they’re just too small to be seen. You need a little bit of logic to make montages.
It was fundamentally easy back then to make montages, just as it was easy, a long time ago, for the Neanderthals to make their tools.
Transcribed from: Gian Piero Frassinelli, Superstudio: Il fotomontaggio al tempo della colla, 2017, video. This text was reproduced in Opening Lines II: Adolfo Natalina/Superstudio, published by Drawing Matter in 2018.
